Most professionals use separate apps for to-do lists, calendars, task timelines, project management, document processing, communication, and collaboration.
However, what if you could use one app to do all of them? Yes, that’s right! You can get multiple things done in one place with productivity apps such as ClickUp, for example. Learn more about ClickUp's features and how to get started for free.
What Is ClickUp?
ClickUp is one of the top-rated productivity platforms for any business or freelance gig. Big enterprises like Google, Booking.com, San Diego Padres, and Uber use ClickUp for workplace productivity.
ClickUp is available as a cloud-based app, desktop app, smartphone app, Chrome extension, email add-ons, and voice assistants. The followings are the core functionalities of the ClickUp app:
- Process management
- Task management
- Time management
- Third-party app integrations
- Complete customization of workspace
- Team collaboration and reporting
- ClickUp proprietary actions
Related: ClickUp vs. Asana: Which Is Better for Project Management?
If you want to try the app, you can start with the Free Forever plan that includes 100MB storage for attachments, unlimited members, and unlimited tasks.
Download: ClickUp for Windows | macOS | Linux | iOS | Android (Free)
How to Get Started With ClickUp
To start using ClickUp, you need to sign-up and then set up your ClickUp Workspace.
Signing Up for ClickUp
To set up your ClickUp account, follow these steps:
- Visit the ClickUp website.
- On the sign-up page, fill up the details like Full Name, Email, and Choose Password.
- Now click on Play With ClickUp.
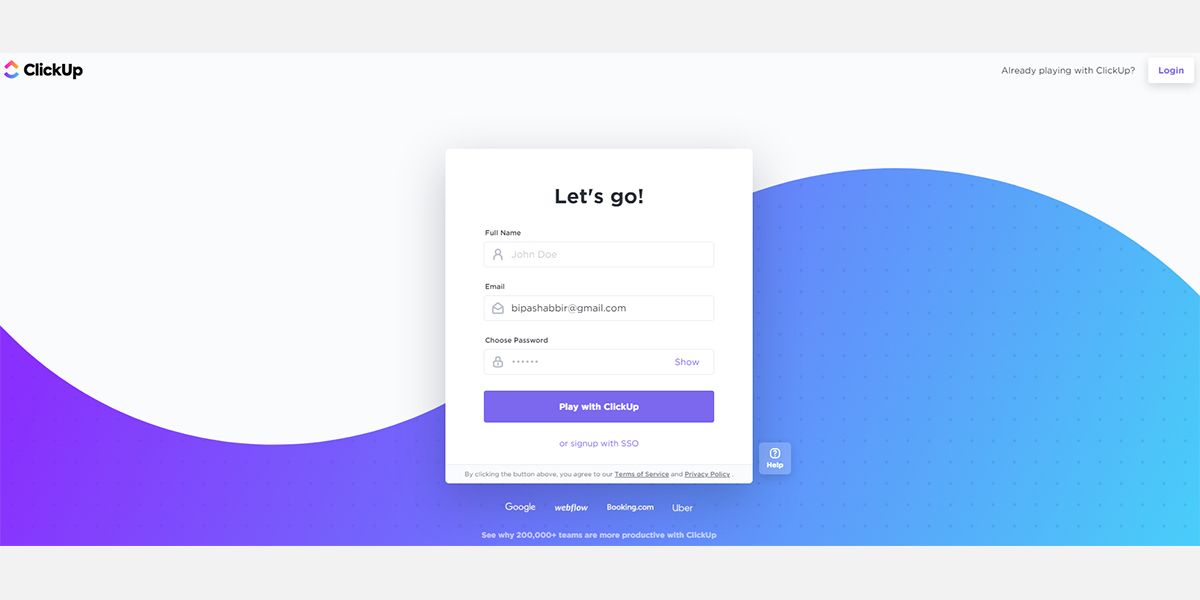
4. On the Verify your account screen, enter the secret code that you receive in your email.
5. You’ll now enter the Welcome screen for Workspace setup.
Setting Up Your ClickUp Workspace
After you sign-up, a Welcome screen will walk you through the initial ClickUp Workspace setup. Here are the steps to follow:
- Click on Let’s do it! to give your Workspace a name.
-
Click Next to personalize your Workspace’s avatar. Drop an image for an avatar or choose the color for your name’s initial. Click on I’m happy so far.
- Next, you need to select a color scheme for your ClickUp theme.
- Select how many people will use the app.
- Click Next and select which ClickApps you want. You can modify the list of ClickApps whenever you want. Now, click on Looks good.
- If you want to import tasks from other apps, you can do so. If you’re not in the mood, click No, thanks.
- Click on Play with ClickUp to enter your ClickUp Workspace.
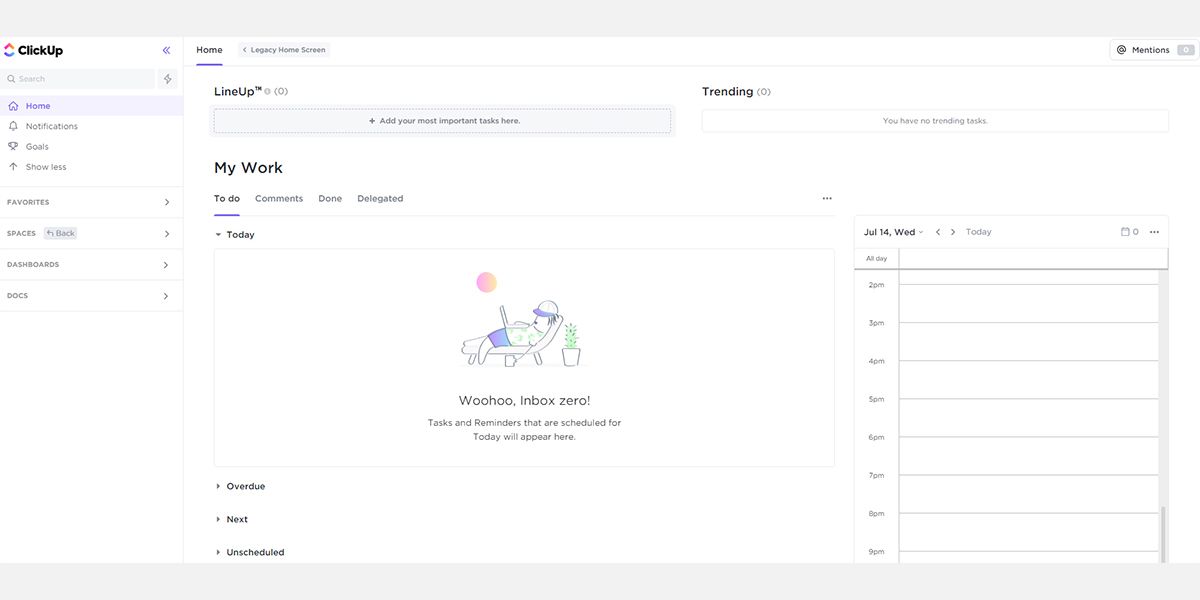
Once you’ve set up the Workspace, you can create tasks, assign tasks to someone, communicate with the team, and know who is doing what. You can also collaborate with the clients and share work progress reports in real-time.
Routine Actions on ClickUp
There are a few routine actions that you need to perform on ClickUp to keep your projects productive. Now that you’re in your Workspace, you can add new Spaces. Spaces are like departments in your business.
- On the left-side panel, click on New Space.
- Enter a name for Space and click Next.
-
You can customize the Space by choosing color, avatar, public Workspace, private Workspace, statuses, ClickApps, and views.
- To add a new task, click on the Space that you created earlier.
- Now, on the right side, click on the box that says Task name.
Give a name to the task, and then click on it to open full view. Here you can add due date, assignee, status, attachments, priority, subtasks, and checklists.
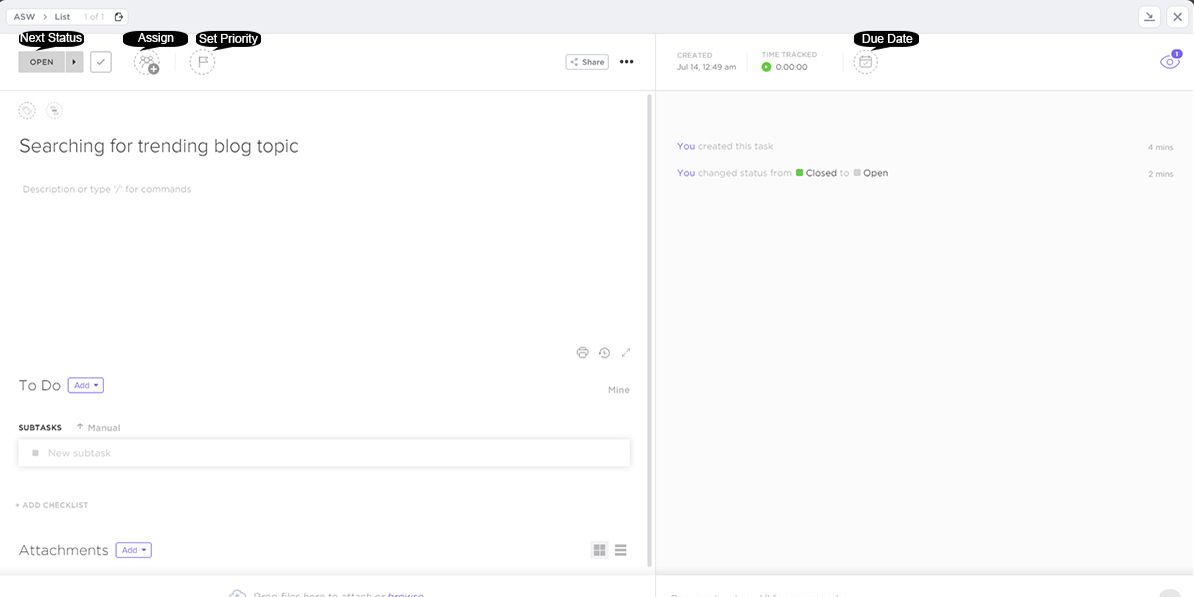
In the Task window, you can enter comments to leave instructions for the assignees. You can @ tag assignees, watchers, or individuals for automatic notifications. You can add Dependencies by clicking on the horizontal Three Dots Menu.
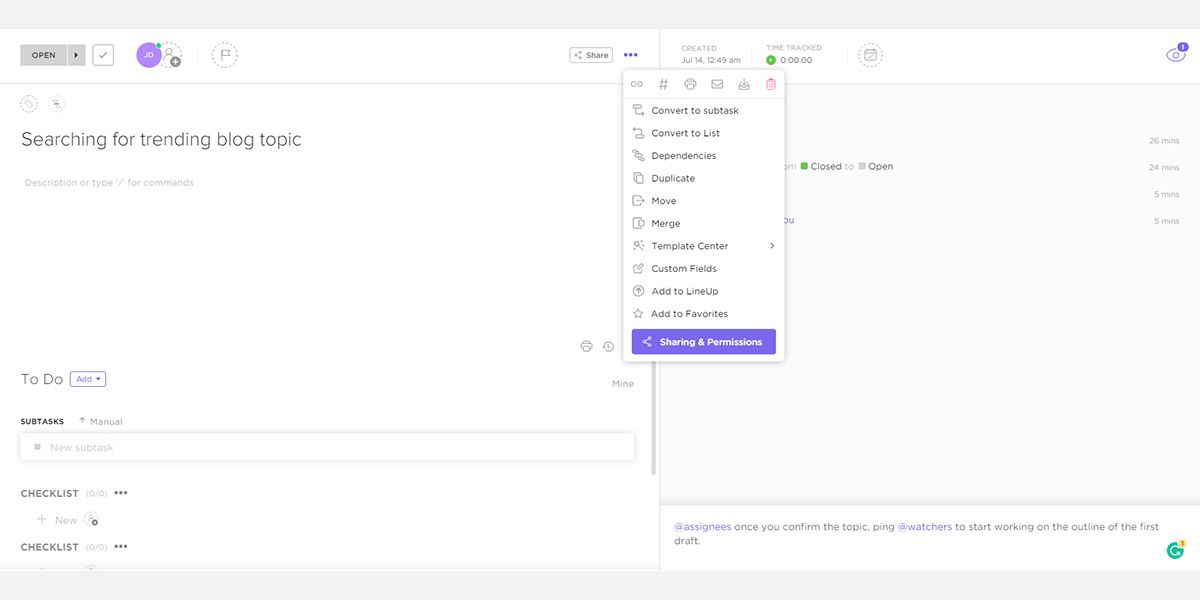
Templates are the best way to automate your task management work in ClickUp. Templates increase productivity by cutting down task organization time.
- Click on your avatar at the lower-left corner and then select Template Center.
- Now, click on the Use Cases and then choose the business type.
- Click on the template and then select Use Template to import a task management queue to your Workspace.
Related: Online Task Management Guide: Tips for Choosing the Right App
You can now assign resources and instructions to the tasks to get the project in motion. ClickUp allows you to add third-party apps so that you can use other apps from one place. To add external apps:
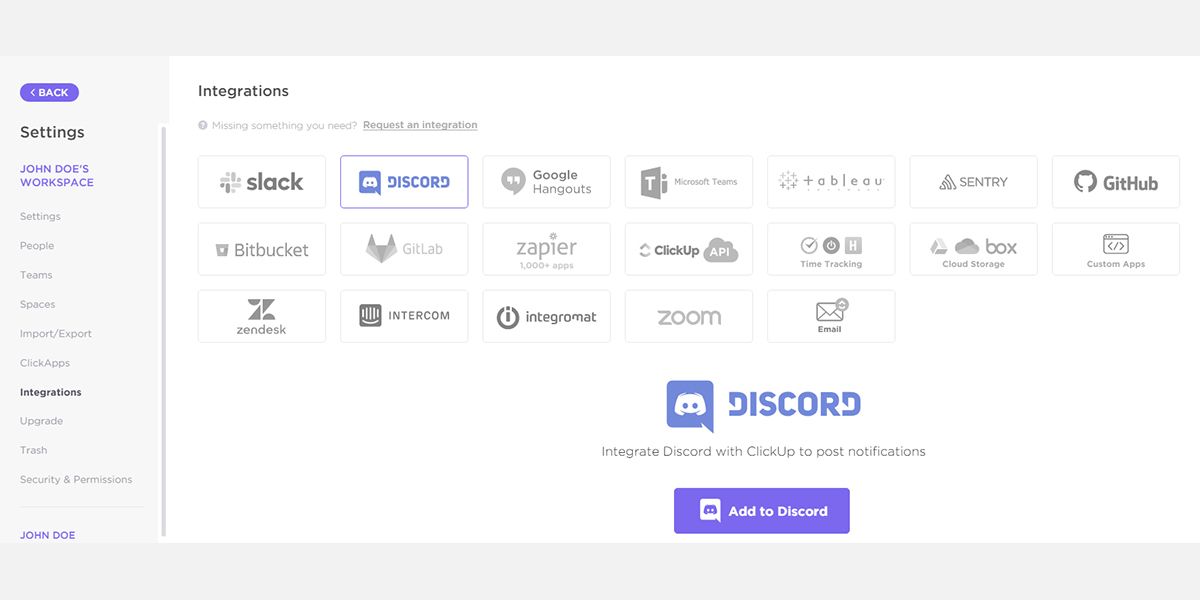
- Click the avatar and then choose Integrations.
- You’ll now see a list of apps that you can add to ClickUp.
Productivity Boosting ClickUp Features
ClickUp offers more than a hundred features to suit every business type. Take a close look at a few best features that help you stay productive:
1. Dashboards:
It is the one-stop-shop for you to manage assignees, tasks, sprints, dependencies, etc. You can add Widgets like Workload by Status, Time Reporting, Calculation, Text Block, Chat, etc.
2. Notepad:
When you’re working on project management, you don’t have to open another app to write down ideas. ClickUp notepad is here for you. You can convert notes to tasks as well.
3. Targets and Goals:
Goals are crucial for project performance. In ClickUp, you can effortlessly manage project goals. Task managers can also make the goals easily achievable by splitting one goal into smaller targets.
4. Workspace Views:
Views allow you to customize ClickUp in many ways to suit the app to your taste of work. Depending on your project needs, you can choose Workspace views from seven options. These are Board view, Box view, Calendar view, List view, Me Mode, Table View, and Timeline view.
5. Assigned Comments:
You can turn comments into tasks and assign them to the available resources. Once you do this, the assignee will see the comment in their Task tray. The assignee can mark the comment as resolved when they complete the task.
6. Task Priorities:
ClickUp offers an intuitive color-coded system for task prioritization. You or your team can choose from the following priority levels Urgent, High, Normal, and Low.
7. Notifications:
ClickUp has a robust notification system to keep the task assignees updated about the progress. Notifications offer higher flexibility through customizations. On your Workspace, select Notifications and then click on the Three Dots Menu to modify notification settings.
8. Reminders:
Keep deliverables on track through the Reminders feature from ClickUp. ClickUp can remind you of your tasks on your desktop, email inbox, smartphone, or even on Alexa/Google Home.
9. Track Time and Task Timer:
The Track Time feature lets you understand how long you and your team are working on specific projects. You can implement timeboxing technique by using Task Timer while working on a task.
10. Record Clip:
Design and develop in collaboration through Record Clip. On your ClickUp Workspace, click on the apps selection icon on the bottom right corner and select Record Clip.
Streamline Your Productivity With an All-in-One App
After knowing the features of the ClickUp app, you might want to give it a try and gauge if the app can elevate your productivity levels. You might learn some new tactics from this app to monitor your time, tasks, and team. You can apply those learnings in your day-to-day routine to make your workday worthwhile.
