So, what did I create? First, I baked a yummy batch of chocolate chip cookies (Shaun got to choose the type of cookie) from Magnolia Table (affiliate link). They have become my go-to chocolate chip cookie recipe, and they always receive rave reviews. Well, except for the time that I was in a hurry and accidentally used white sugar instead of brown sugar. They were still edible, but let's just say I didn't take them to church with me as planned...
While waiting for my trays of cookies to bake, I started flipping through this year's Algebra 2 binder. I was looking for inspiration for something to create. Ahhh...yes...transformations. It's such a crucial topic in Algebra 2 and plays a huge role in Shaun's Algebra 2 Notes which I am currently using to based my Algebra 2 curriculum on. It's definitely one of the areas where I had the most need for improvement. As the year progressed and we performed transformations on the different parent functions we encountered, I found that my instruction got better and better.
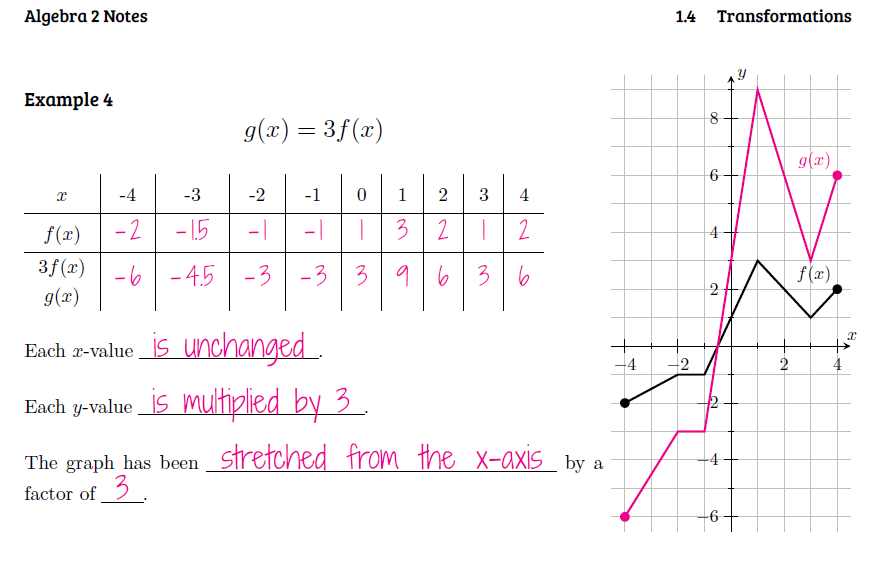 |
| Image Source: https://primefactorisation.com/blog/2020/03/25/algebra-2-class-notes-v-0-3/ |
So, I needed something self-checking. Something where students knew without a doubt whether their sketch of the transformation was correct. And, I wanted something technology free so I could better monitor groups to see that they were on-task. This has all been a VERY long-winded way to say I made a word search.
No, not that type of word search.
I know what you're thinking.
We won't be staring at an array of scrambled letters until our eyes bleed looking for the letters that spell out REFLECTION and TRANSLATION. Maybe those type of word searches have a proper educational use in some circumstances, but my own memories of school equate word searches with busy work. And, I've got too many important math concepts to teach to give my students busy work.
It's a totally new type of word search, and I'm super excited to get to try it out in my Algebra 2 classroom come August or whenever we get to teach in classrooms again.
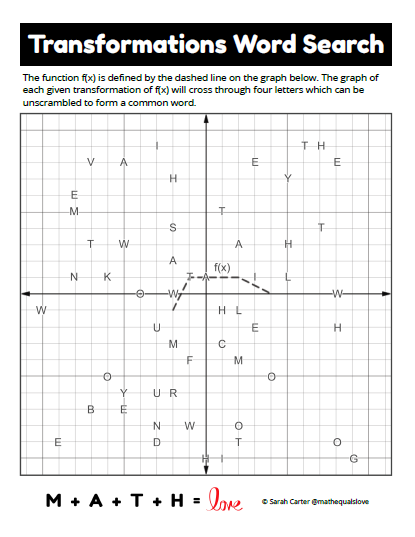
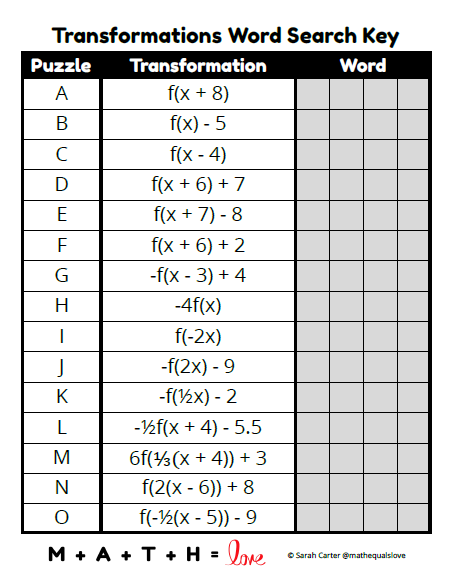
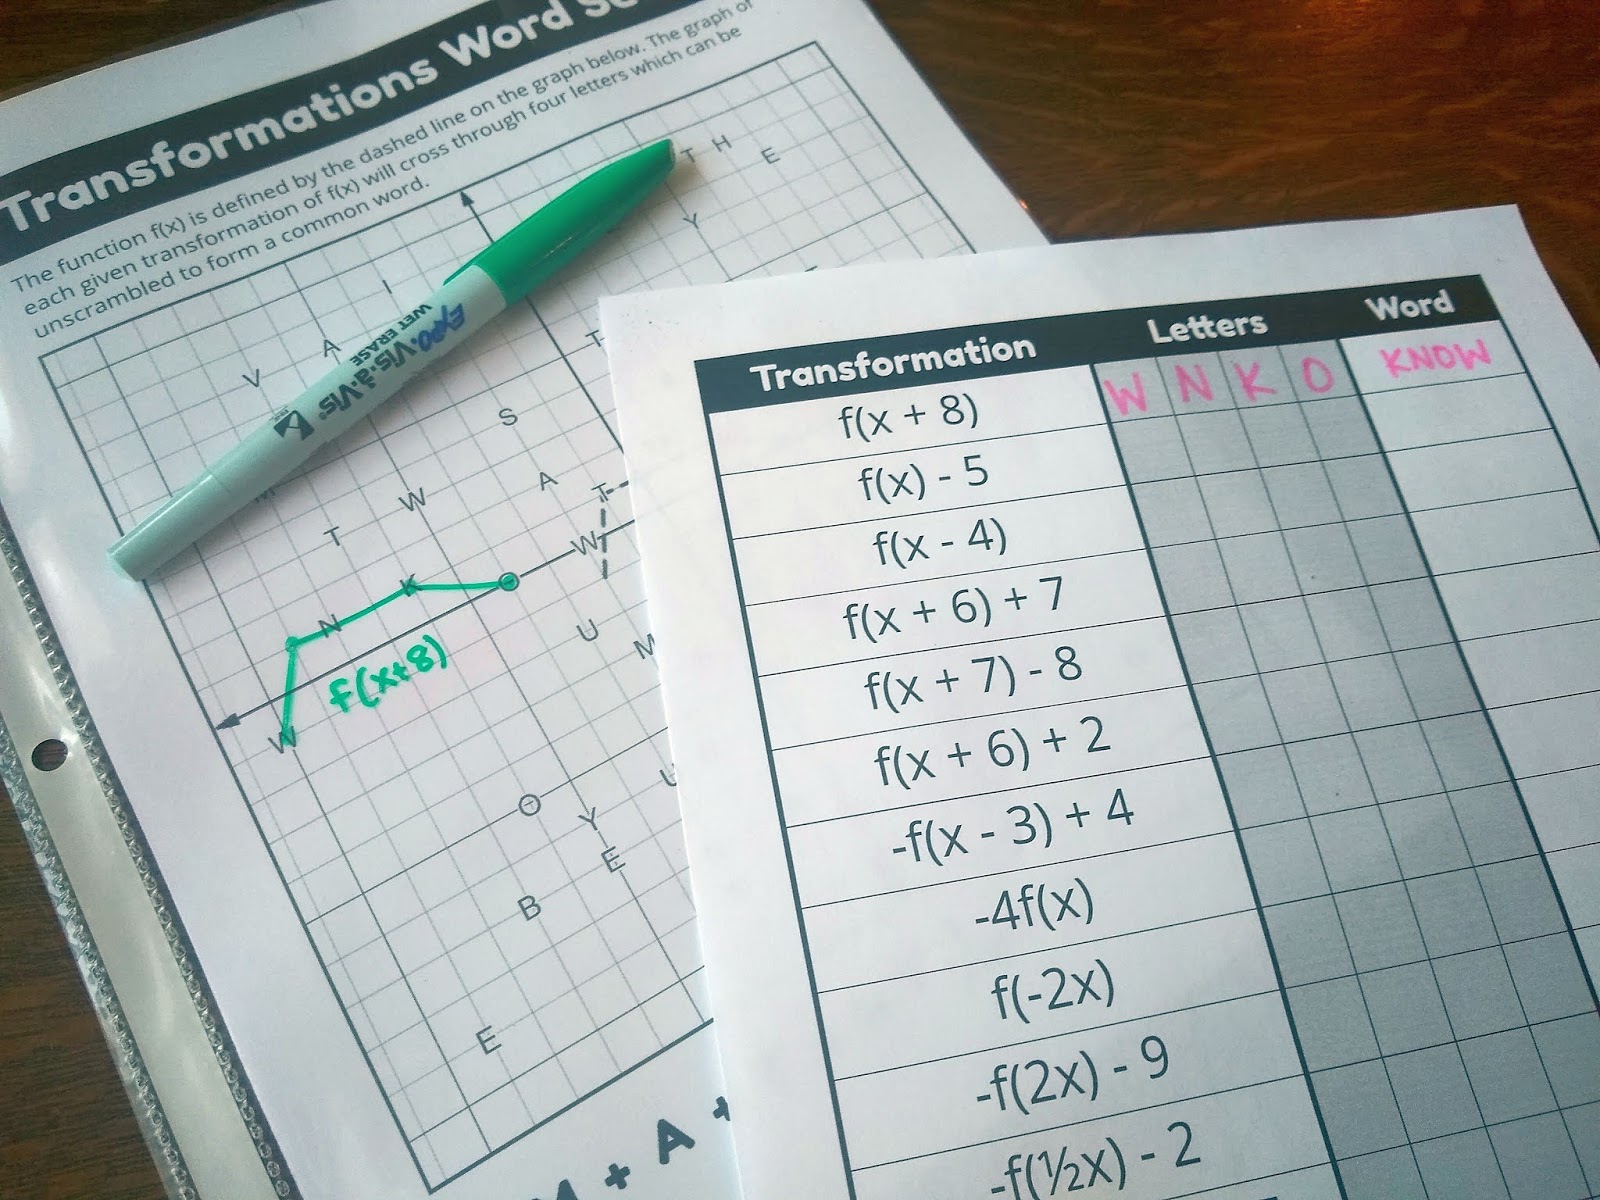
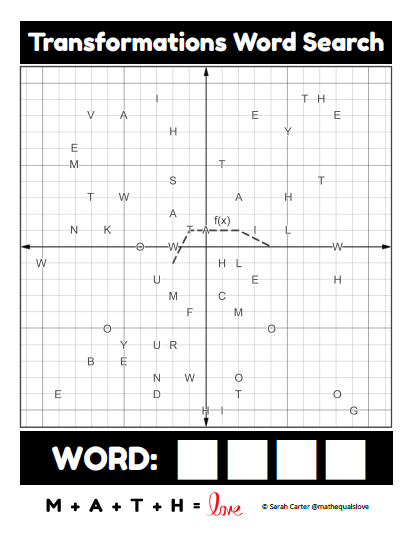
There are fifteen different transformations of f(x) which when graphed join together four of the letters on the coordinate plane. When these four letters are unscrambled, they form a common school-appropriate four-letter word.
For example, if you were to sketch f(x + 6) + 2, you would get something that looks like this:

The transformed graph joins together the letters N, T, W, and A which can be unscrambled to spell WANT.
If students don't get a graph that joins four letters together or if the four letters they do find don't spell a word, they will know that they have done something wrong. Self-checking activity for the win!
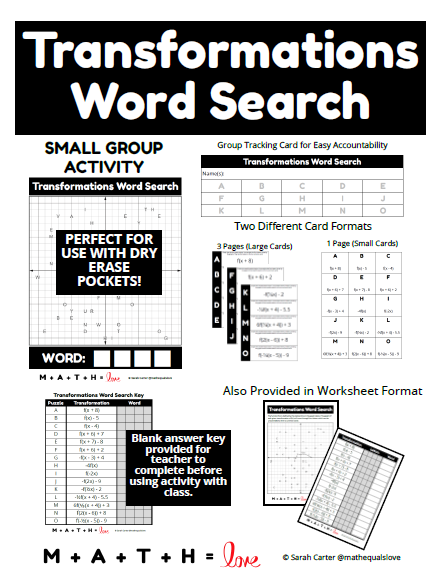
Because I like to overcomplicate things, I made several versions. All the versions currently use the same letters and transformations. If this activity proves to be popular, I might make different versions in the future to focus more specifically on certain types of transformations or levels of difficulty.

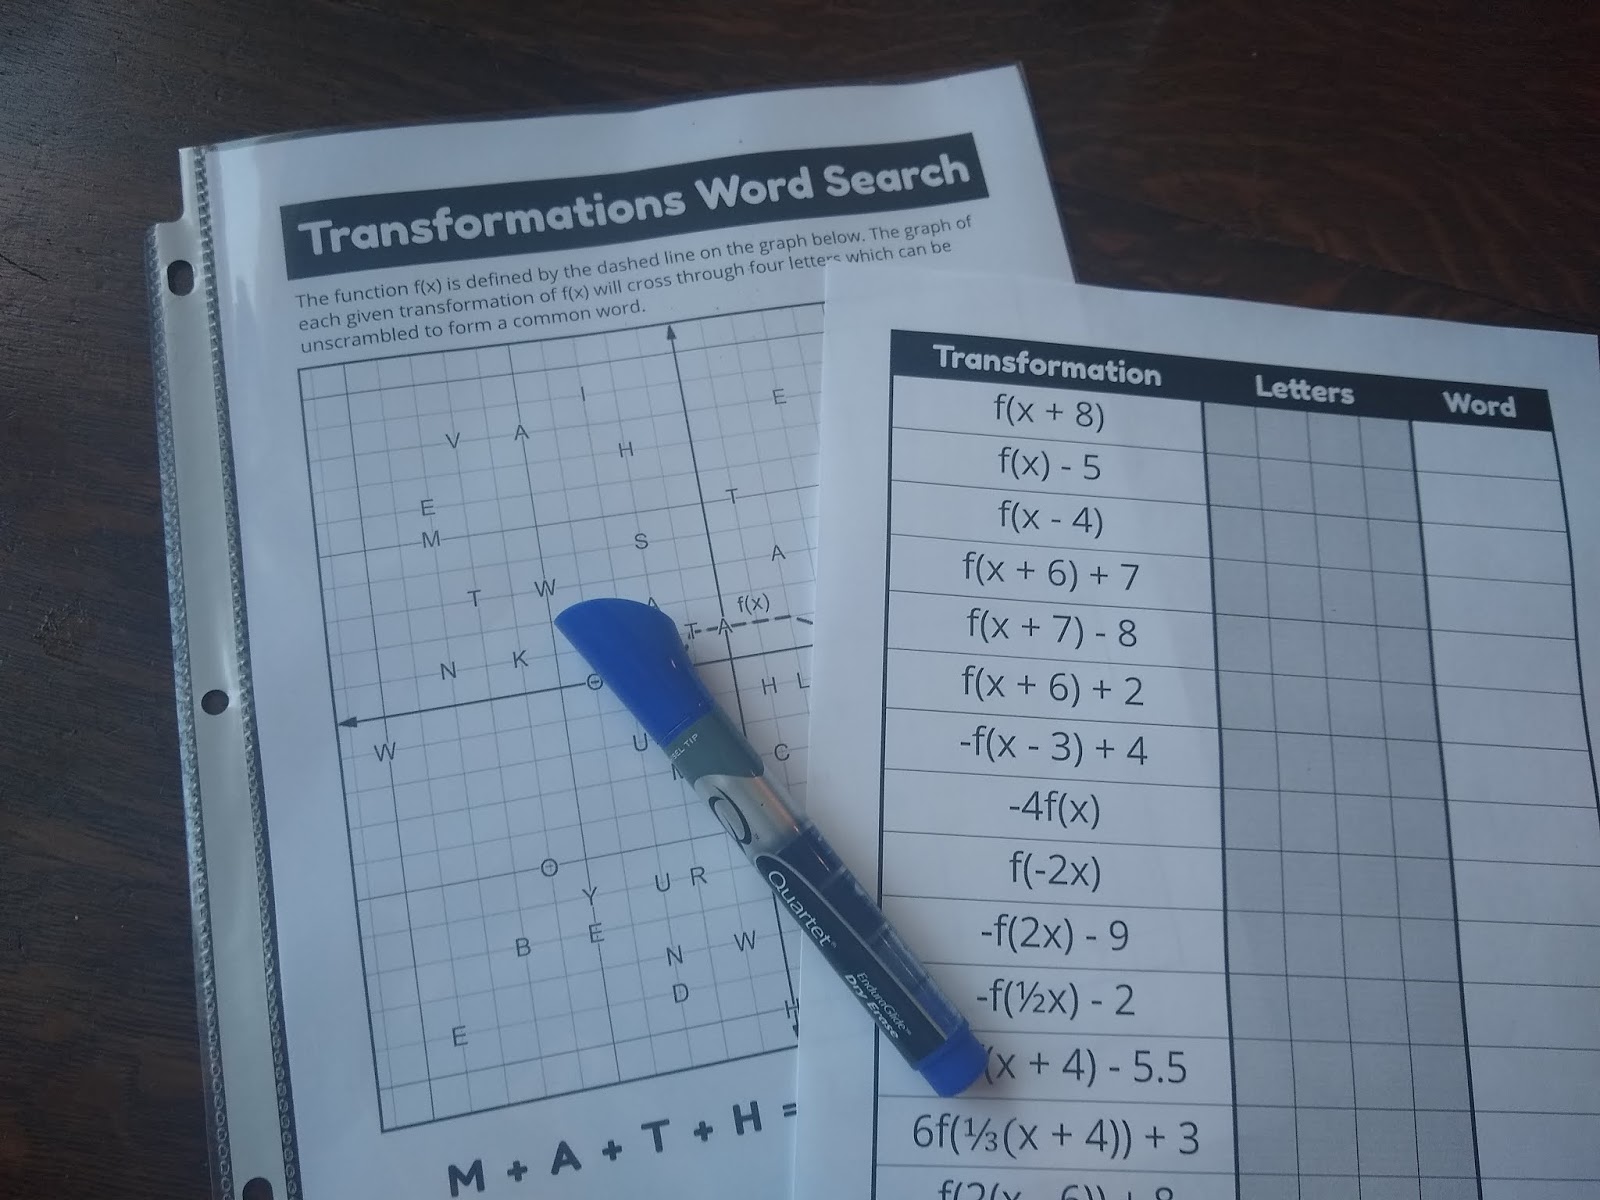
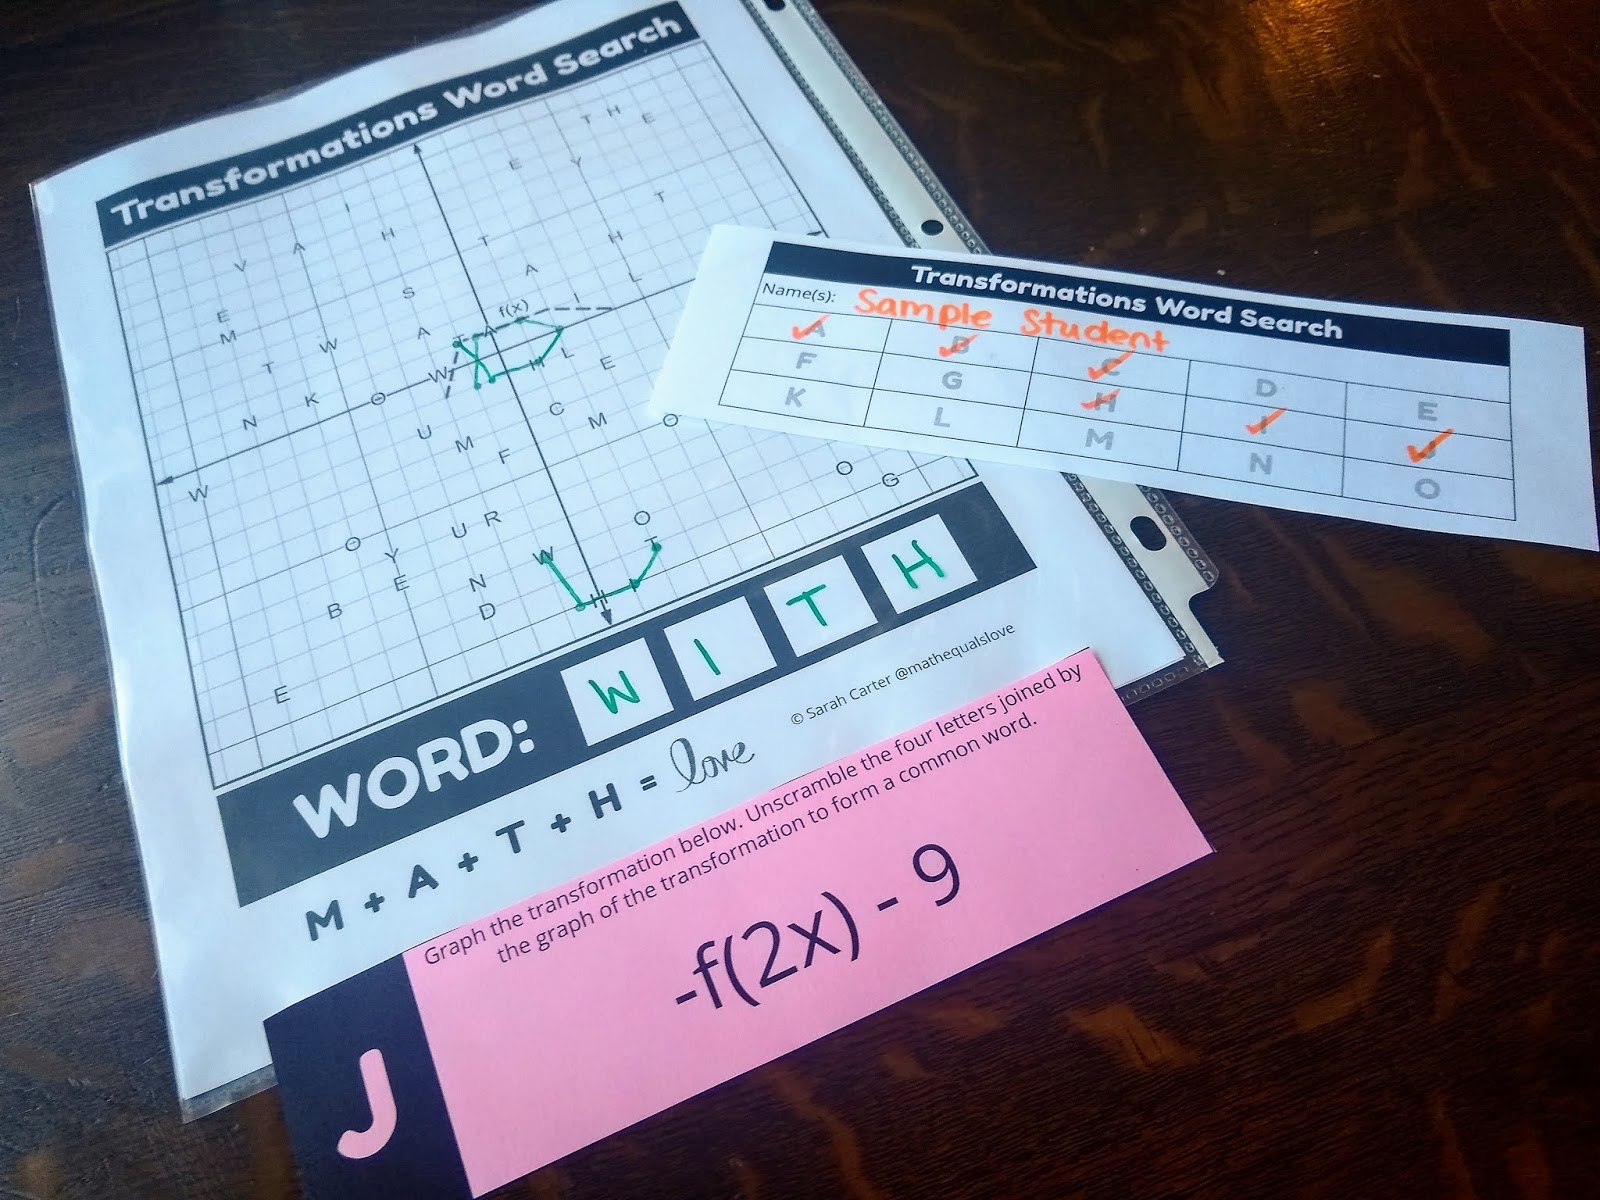
Even if you do elect to take the worksheet route, may I recommend placing the graph in a dry erase pocket (affiliate link)? It will make your students' lives SO MUCH EASIER. All of my dry erase pockets are at school, so you will have to settle for a picture of my graph in a sheet protector. By the way, sheet protectors work completely fine for this. But, I prefer the sturdiness and improved erasability you get from a bit more high end product like a dry erase pocket (also known as shop ticket holders.)
I hesitate to use the activity in this form in my own classroom because I fear it would lead to the same result I get when I try to use one of those clever joke worksheets. One student works diligently to figure out the puzzle, and then can't contain themselves from shouting the answer out to the ENTIRE CLASSROOM. Is that just my students?!?
Most likely, this will be featured in my classroom as a small group activity where students are probably arranged in pairs. They will be given one challenge at a time. After completing each challenge, they will bring it back to my desk. I will check their answers and give them a new challenge.
To facilitate this small group version of this activity, I decided to make cards with each of the transformations written on them. And, because I couldn't help myself, I made two different versions of the cards, 5 to a page and 15 to a page. The 5 to a page cards look nicer and each feature the instructions, but I realize copy limits are a reality in many districts. If you hate cutting and laminating, you'll definitely want to go for the 15 to a page version.
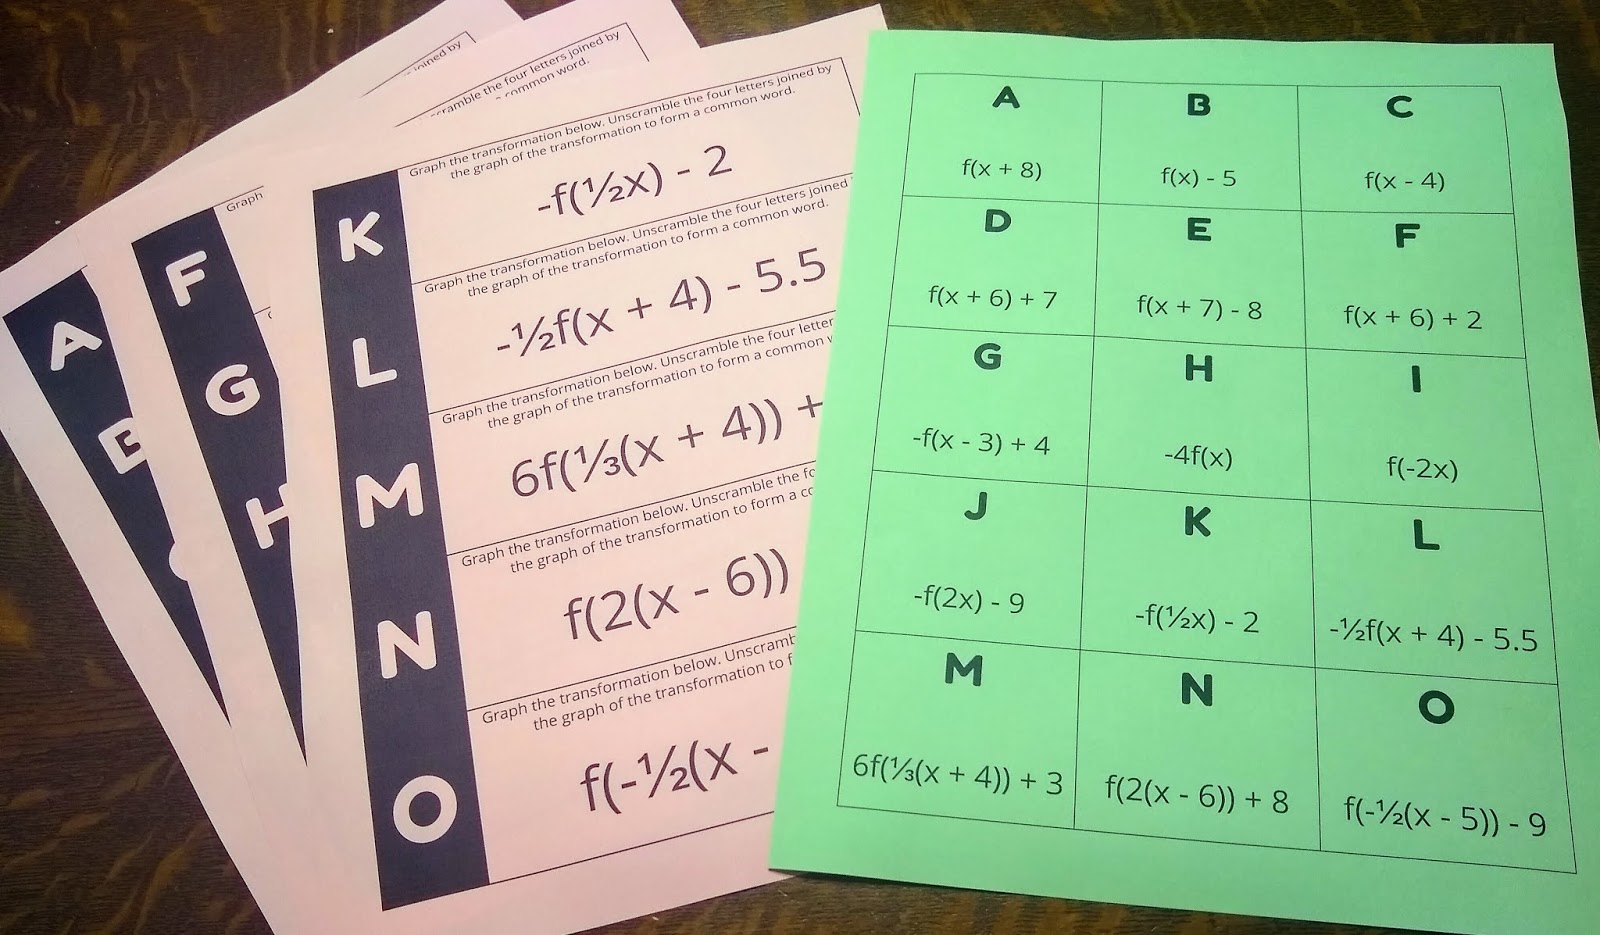
This small group version also called for a small edit to the dry erase template.
I've done quite a few of this style of activity in my classroom. One things my students always struggle with is keeping track of which challenges they have completed. To help them in this regard, I usually try to provide students with a small slip of paper to track their progress. You can use this in several ways. Students can track their own progress. If you have a highly motivated group of students, you could take yourself out of the equation and not require students to check their solutions with you. They would just mark off their completed challenge on their tracking sheet and grab a new challenge from the table.
If you students need a bit more external motivation, you can use a stamp to mark their sheets as they finish each challenge. Initials work fine for this as well. I also sometimes break out my trusty single hole punch to mark which challenges students have completed. I often use these tracking sheets to give a participation grade of sorts for activities. I decide on a number of challenges that students must complete to receive "full credit." If groups exceed this number of challenges, I give them a minor amount of extra credit.

Another perk of doing this as a small-group activity instead of just a worksheet is that it gives the teacher more control over the challenge. Maybe horizontal stretches and compressions are outside of the content of your course. Just pick out the transformations that you want to use with your students and ignore the rest. There will be letters on the coordinate plane that your students never use, but that's completely fine.
Or maybe you want to do this a whole class activity. Give each student a copy of the graph in a dry erase pocket. Project a transformation on the screen. Then every student can attempt it at the same time.
I love that each teacher can put their own sort of spin on this activity to try and meet their students' specific needs. I can't wait to see what you guys come up with!
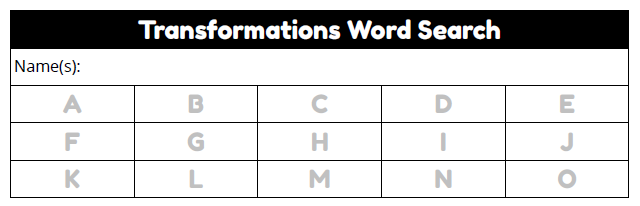
One last thing. I have included a blank answer key in the file for this activity. I have intentionally NOT included the answers on the key. I have two reasons for doing so. First, my students are master googlers. I've lost count of the number of times students have discovered I have a blog because they have gone searching for the answers to an activity I created. Even more importantly, I don't think any teacher should be using this activity in their classroom if they haven't worked through it themselves. So, print off the blank answer key, and give the activity a try yourself. Enjoy!