

Here's a good rule of thumb: Any time you find yourself copying a document to reuse over and over again or find yourself filling out blanks in a document, it's time you can save with automation. Zapier lets you automatically fill out Google Docs templates based on triggers from other apps.
My team at Slack uses Google Docs to prepare all our art briefs for our blog. They're designed to be seen and used by dozens of people, and creating a new one used to be a five-to-ten-minute process—which adds up when you do it a dozen times a week. That process now takes about a minute. Here's how we did it in Zapier.
Zapier is an automation tool that lets your apps talk to each other. Check out this Zapier demo to learn more about how it works.
Step 1: Design your Google Docs template and create a Google Form to build it
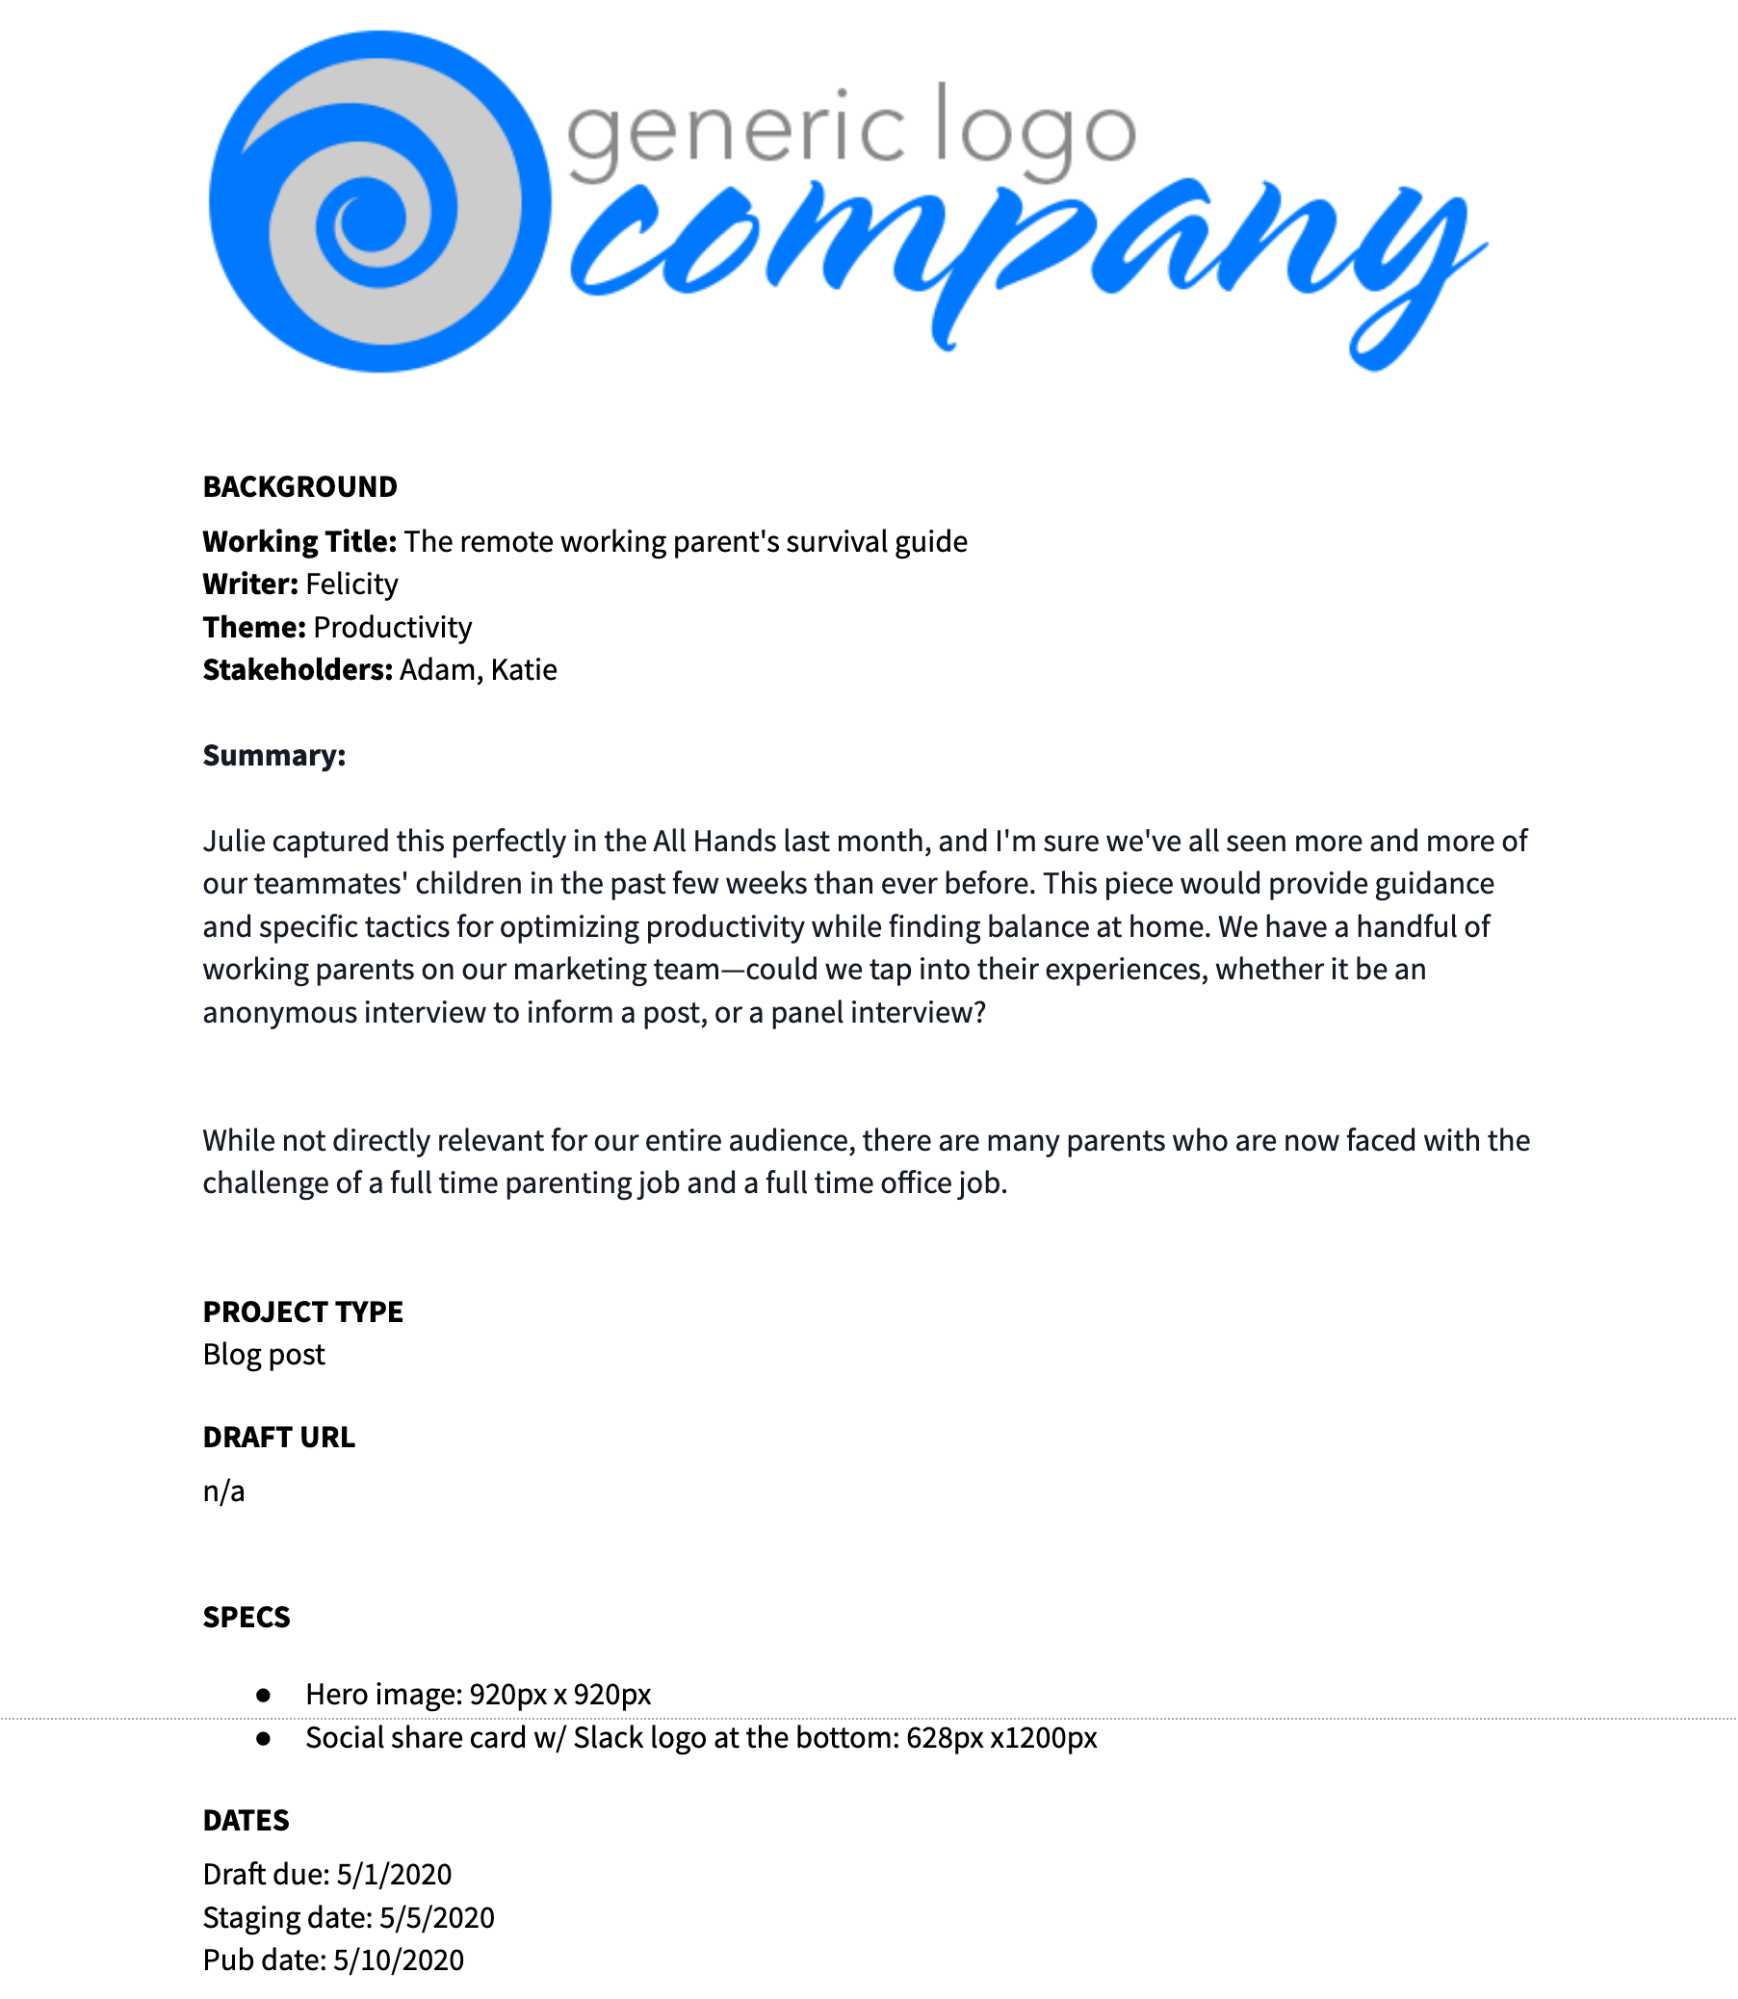
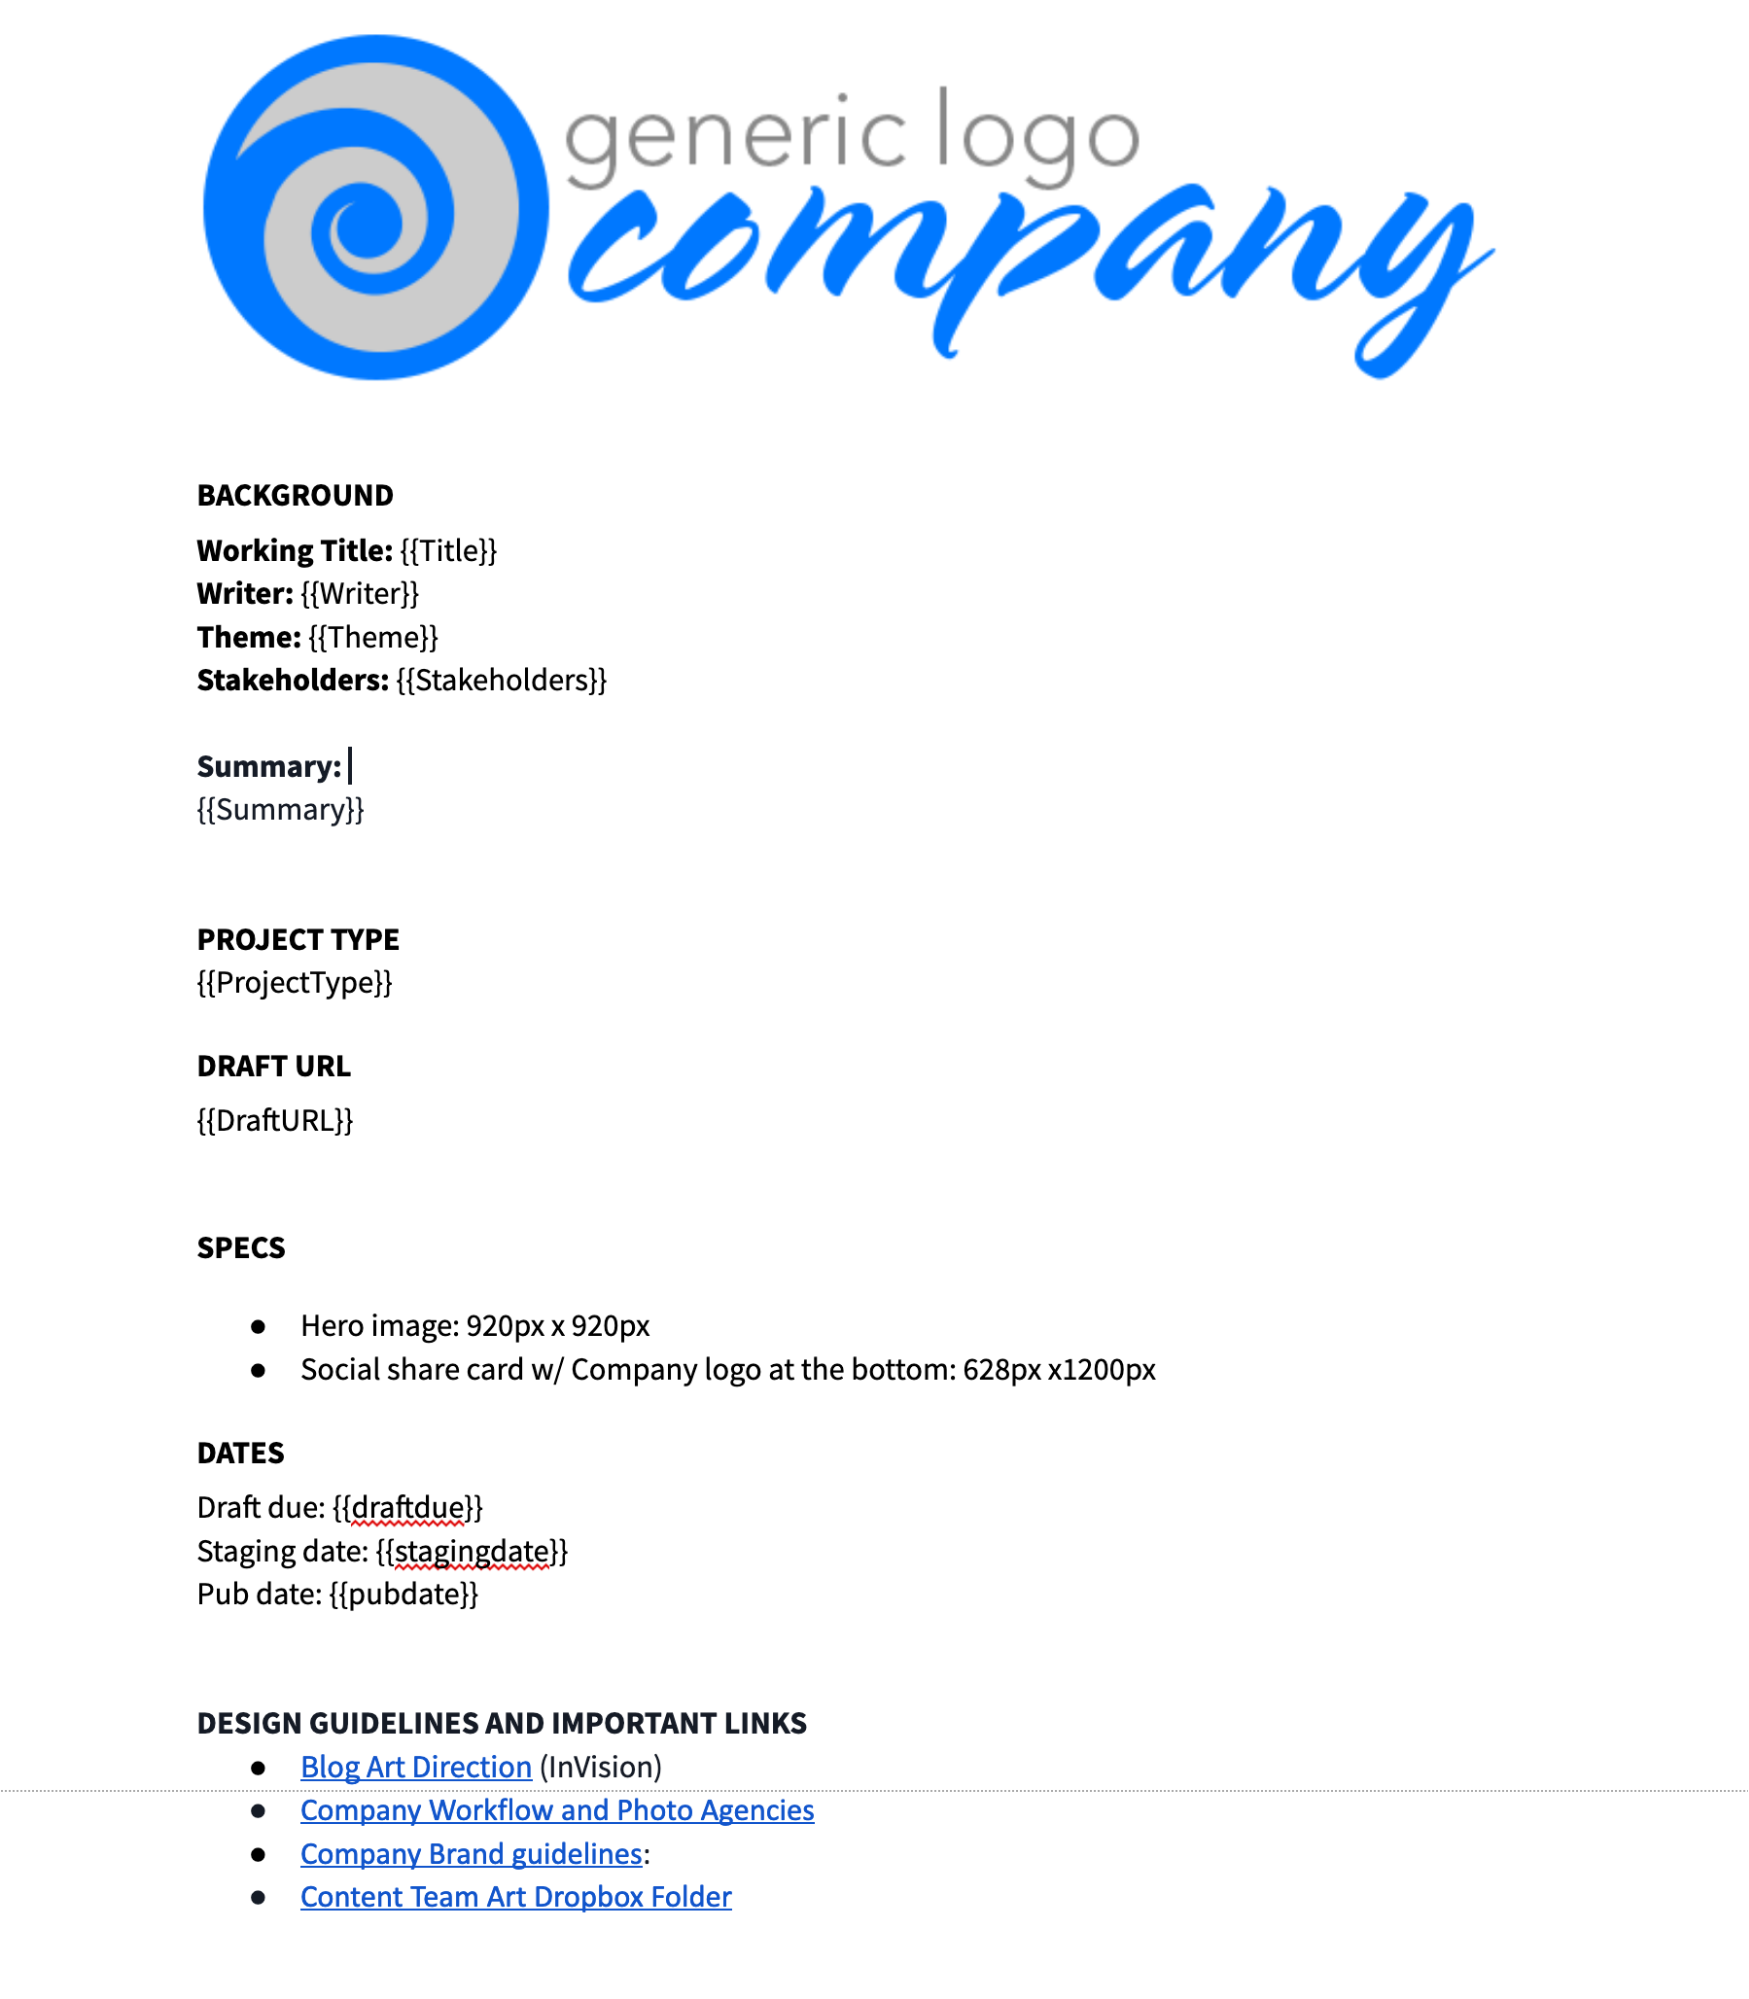
The best place to begin is at the end—figure out what you want your final document to look like, and then build a template based on it. Use images, formatting, and whatever else needed to make it scannable and useful for everyone that uses it.
Next, create a new questionnaire with a field for everything needed in the final document, using Google Forms. Give each question a descriptive title you can use later in the results. Each title needs to be one word or multiple words separated by a character (like Writer_Name).
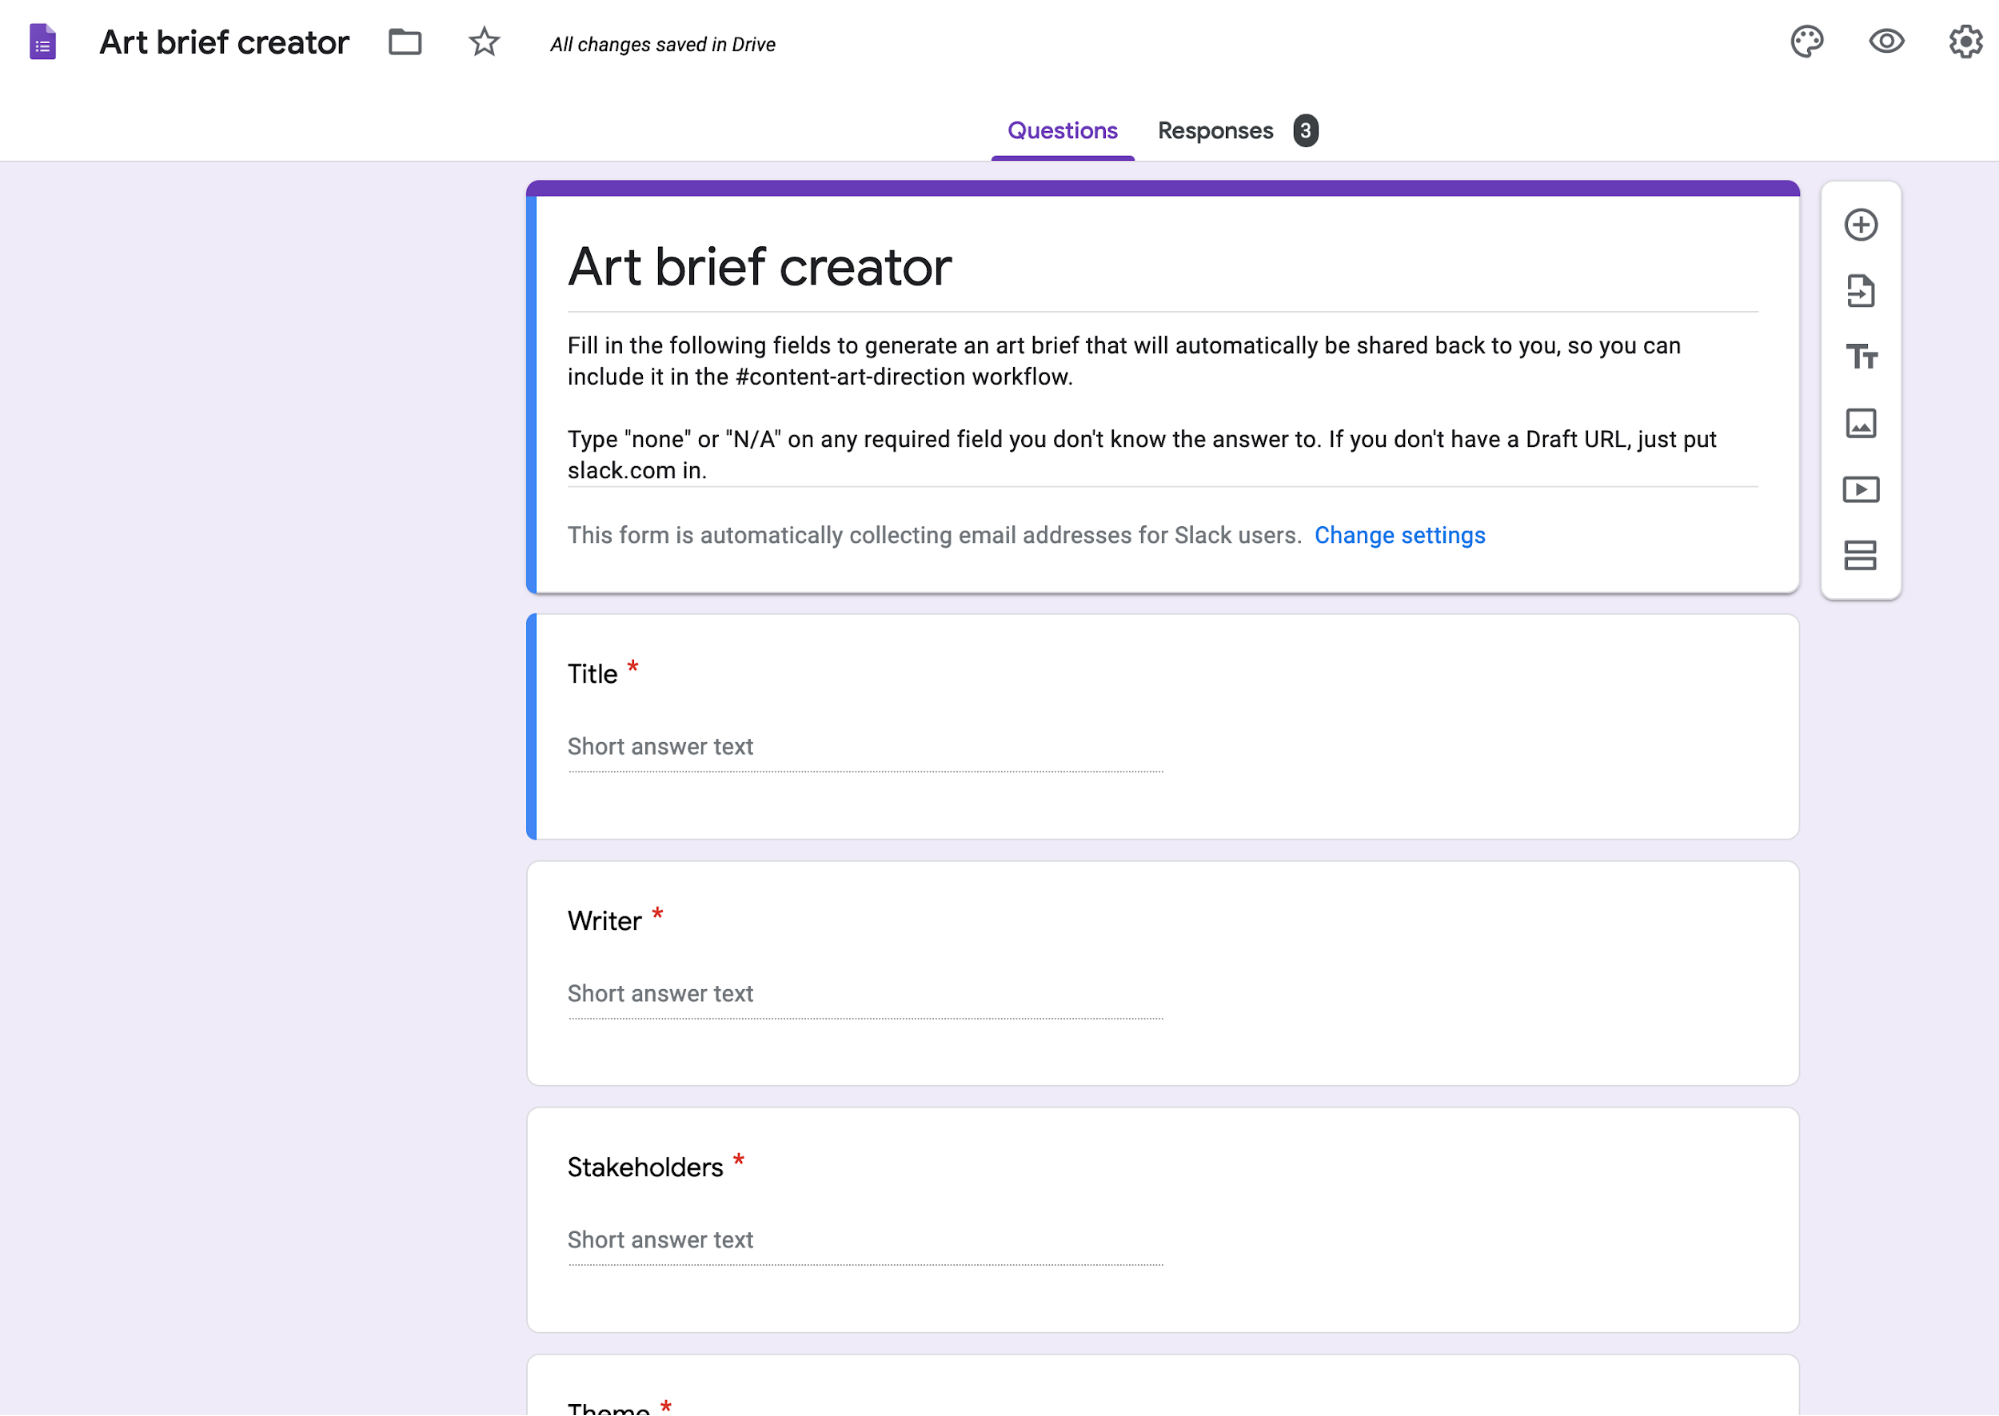
Be sure to put instructions in your form that blank fields will require an answer (like N/A or none) and set every field to required.
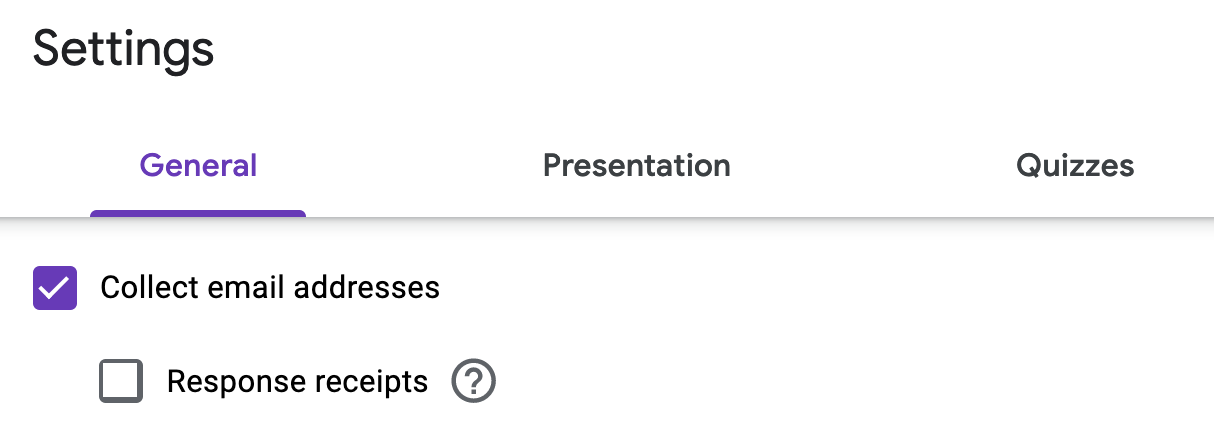
Go into Settings, and turn on Collect email addresses. You'll use this later to be able to send the finished product out.
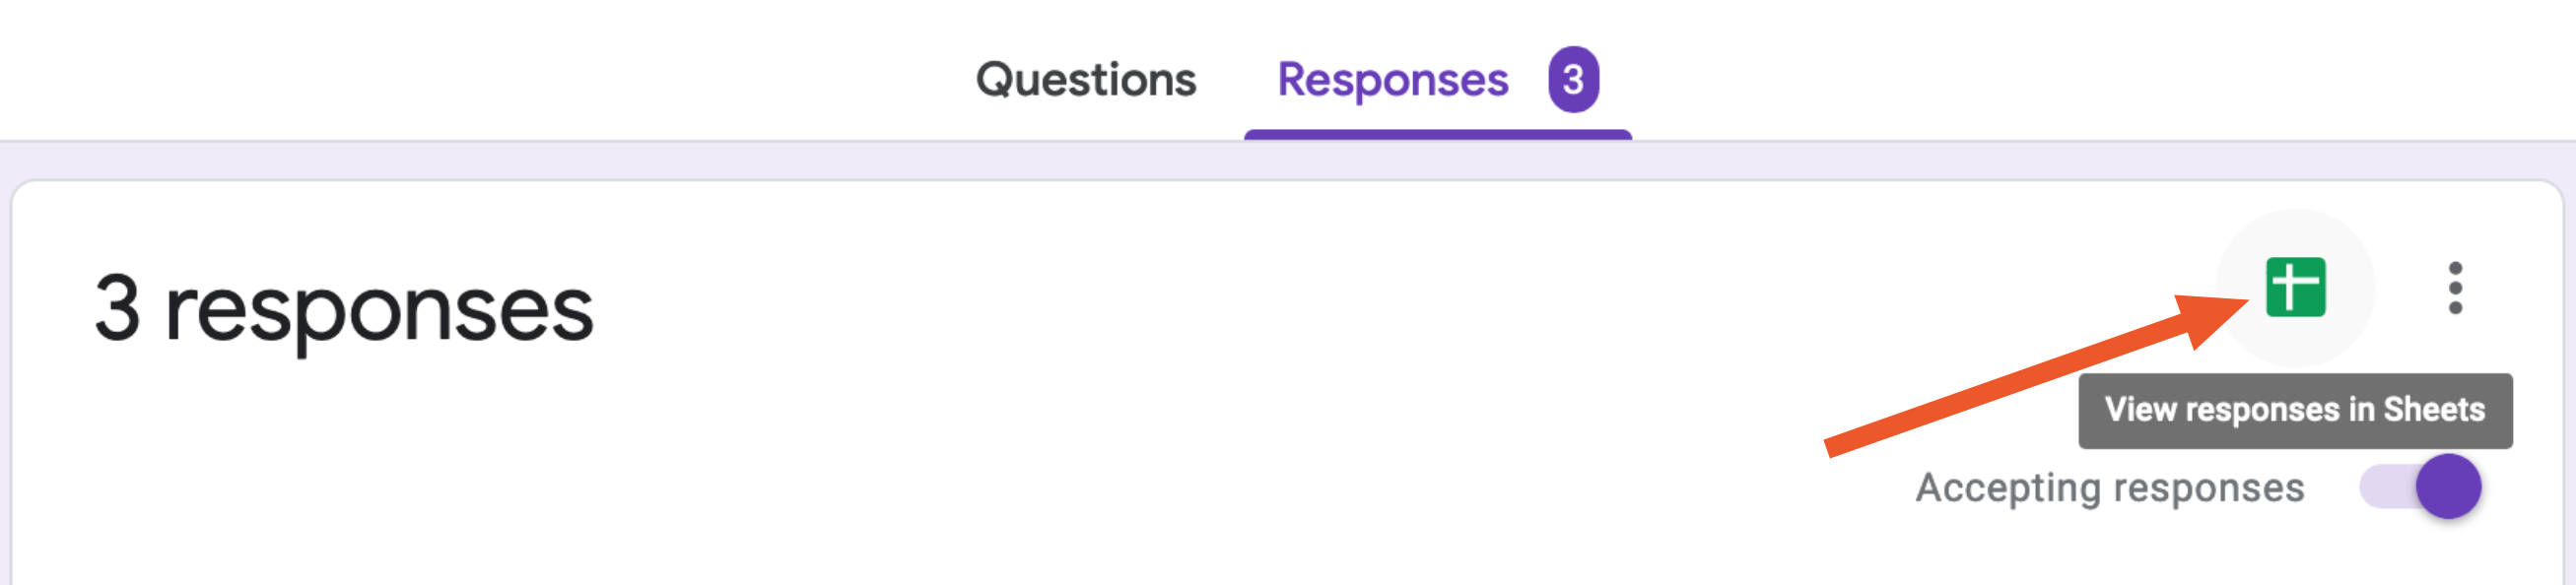
Test out your form, then check your Responses tab. You'll see a link to responses in Google Sheets. Click that—you'll need it for the next step of your Zap.
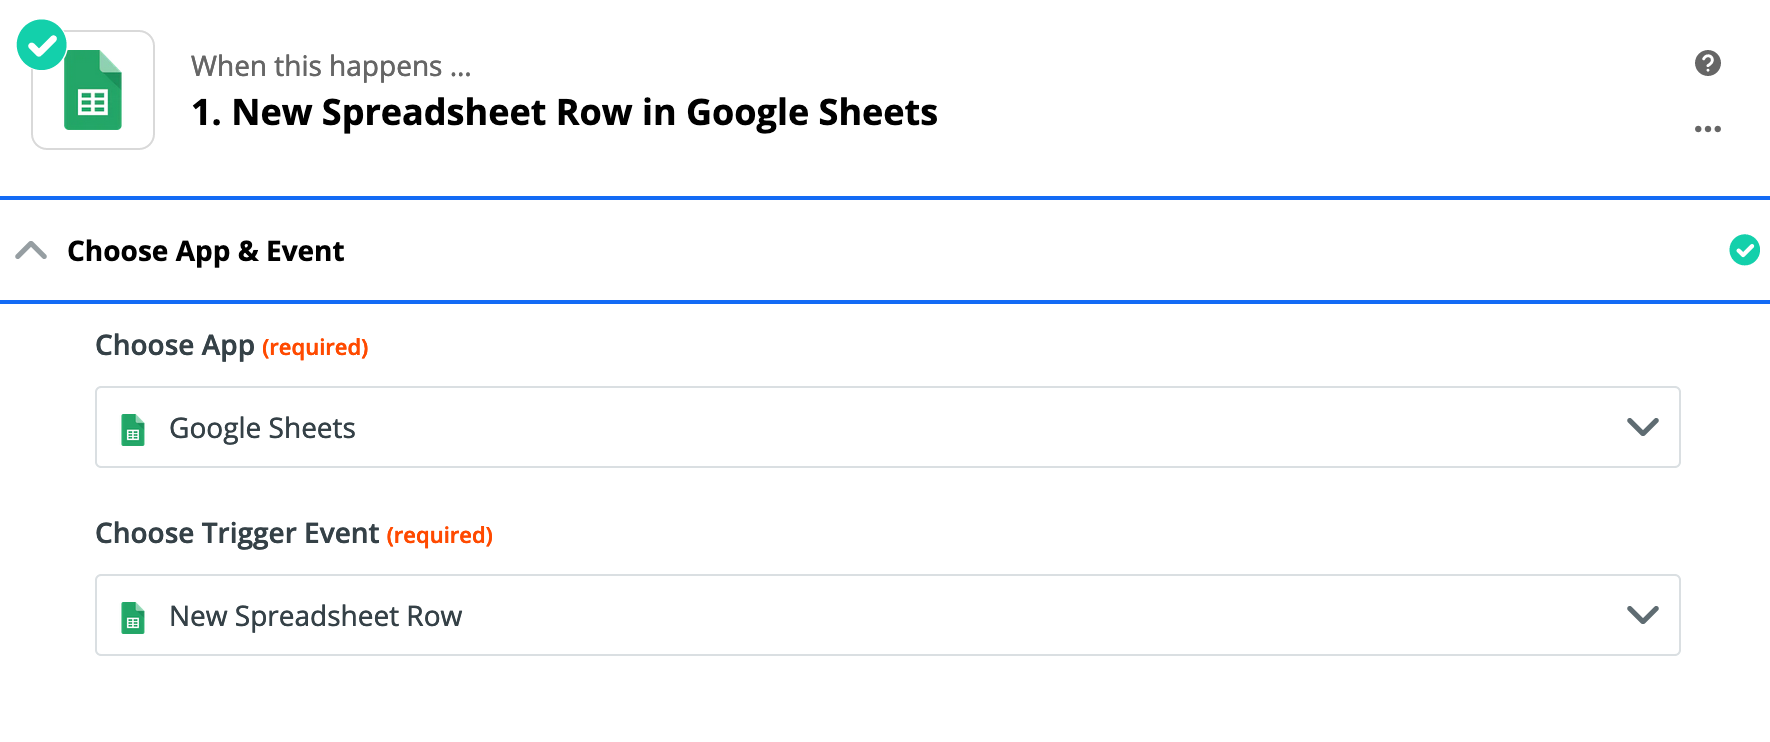
Step 2: Create a Zap to trigger when new rows are added to your Google Sheets results
Create a new Zap for Google Sheets that kicks off whenever there is a new row added.
Editor's note: If you're using Google Forms, you can also trigger this workflow straight from Google Forms. Check out our Google Forms integration for more information.
Select your Google Sheets account on the next screen. Then select your Google Sheets spreadsheet containing responses from your Google Form, and make sure you pick the correct worksheet (there should be only one).
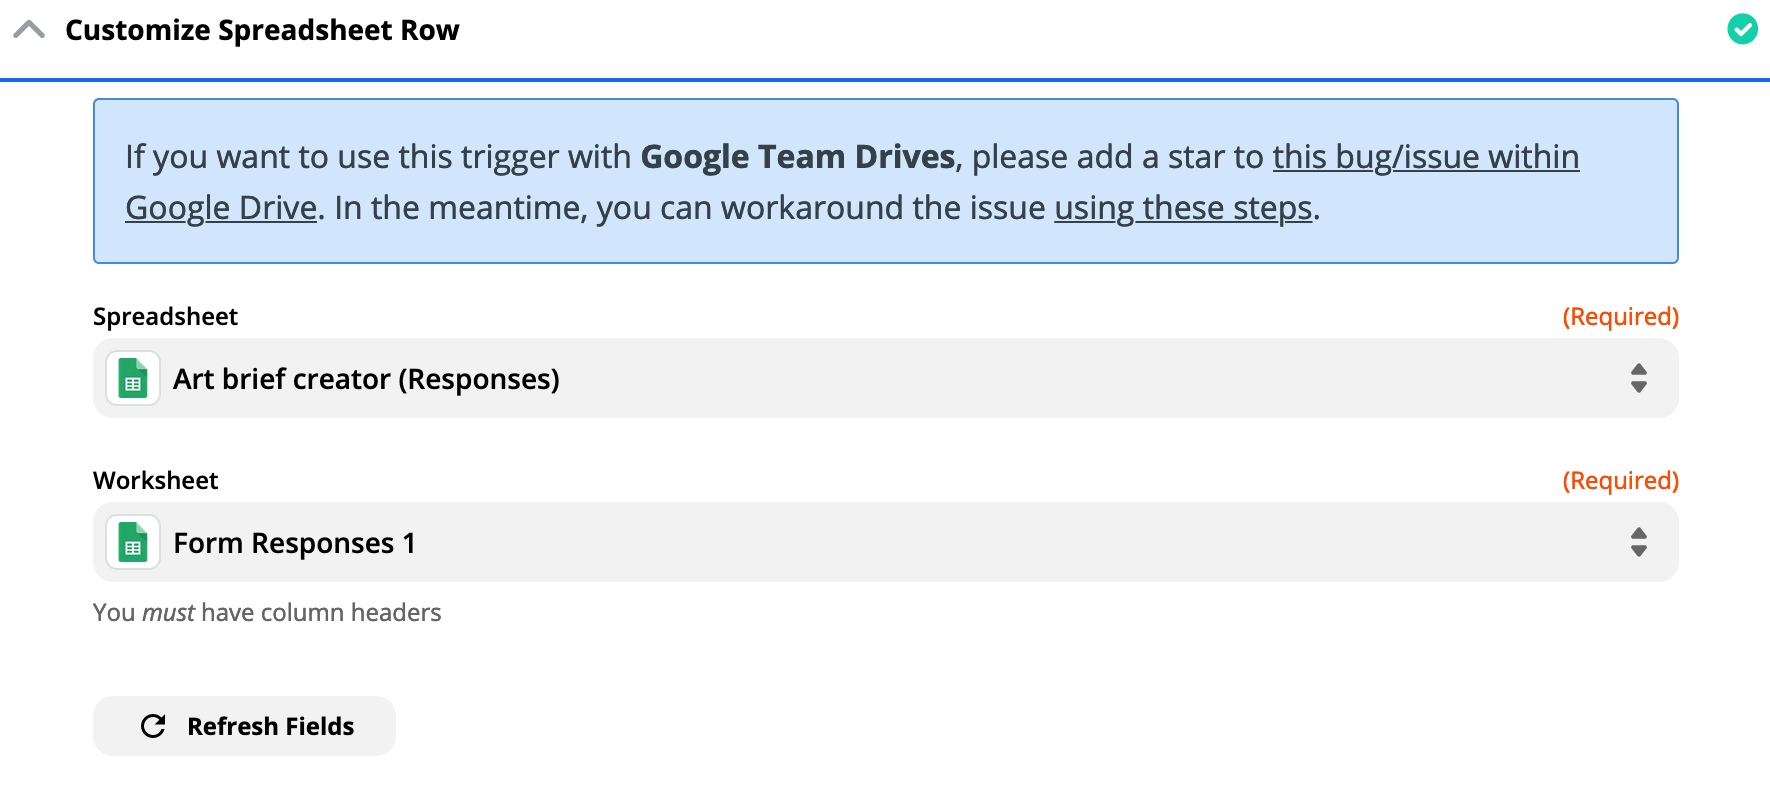
Run a test to make sure all the data can be seen by Zapier, and then it's Google Docs time.
Step 3: Create a Google Docs template and wire it up in Zapier
Make a copy of the Google Doc you designed in the first step. Give this template doc a descriptive title you can easily find in Zapier.
Wherever you'd like the answers from your original Google Form to appear, type each question's title in the doc surrounded by curly brackets (two on each side of the title). These will be replaced with real data in the next step.
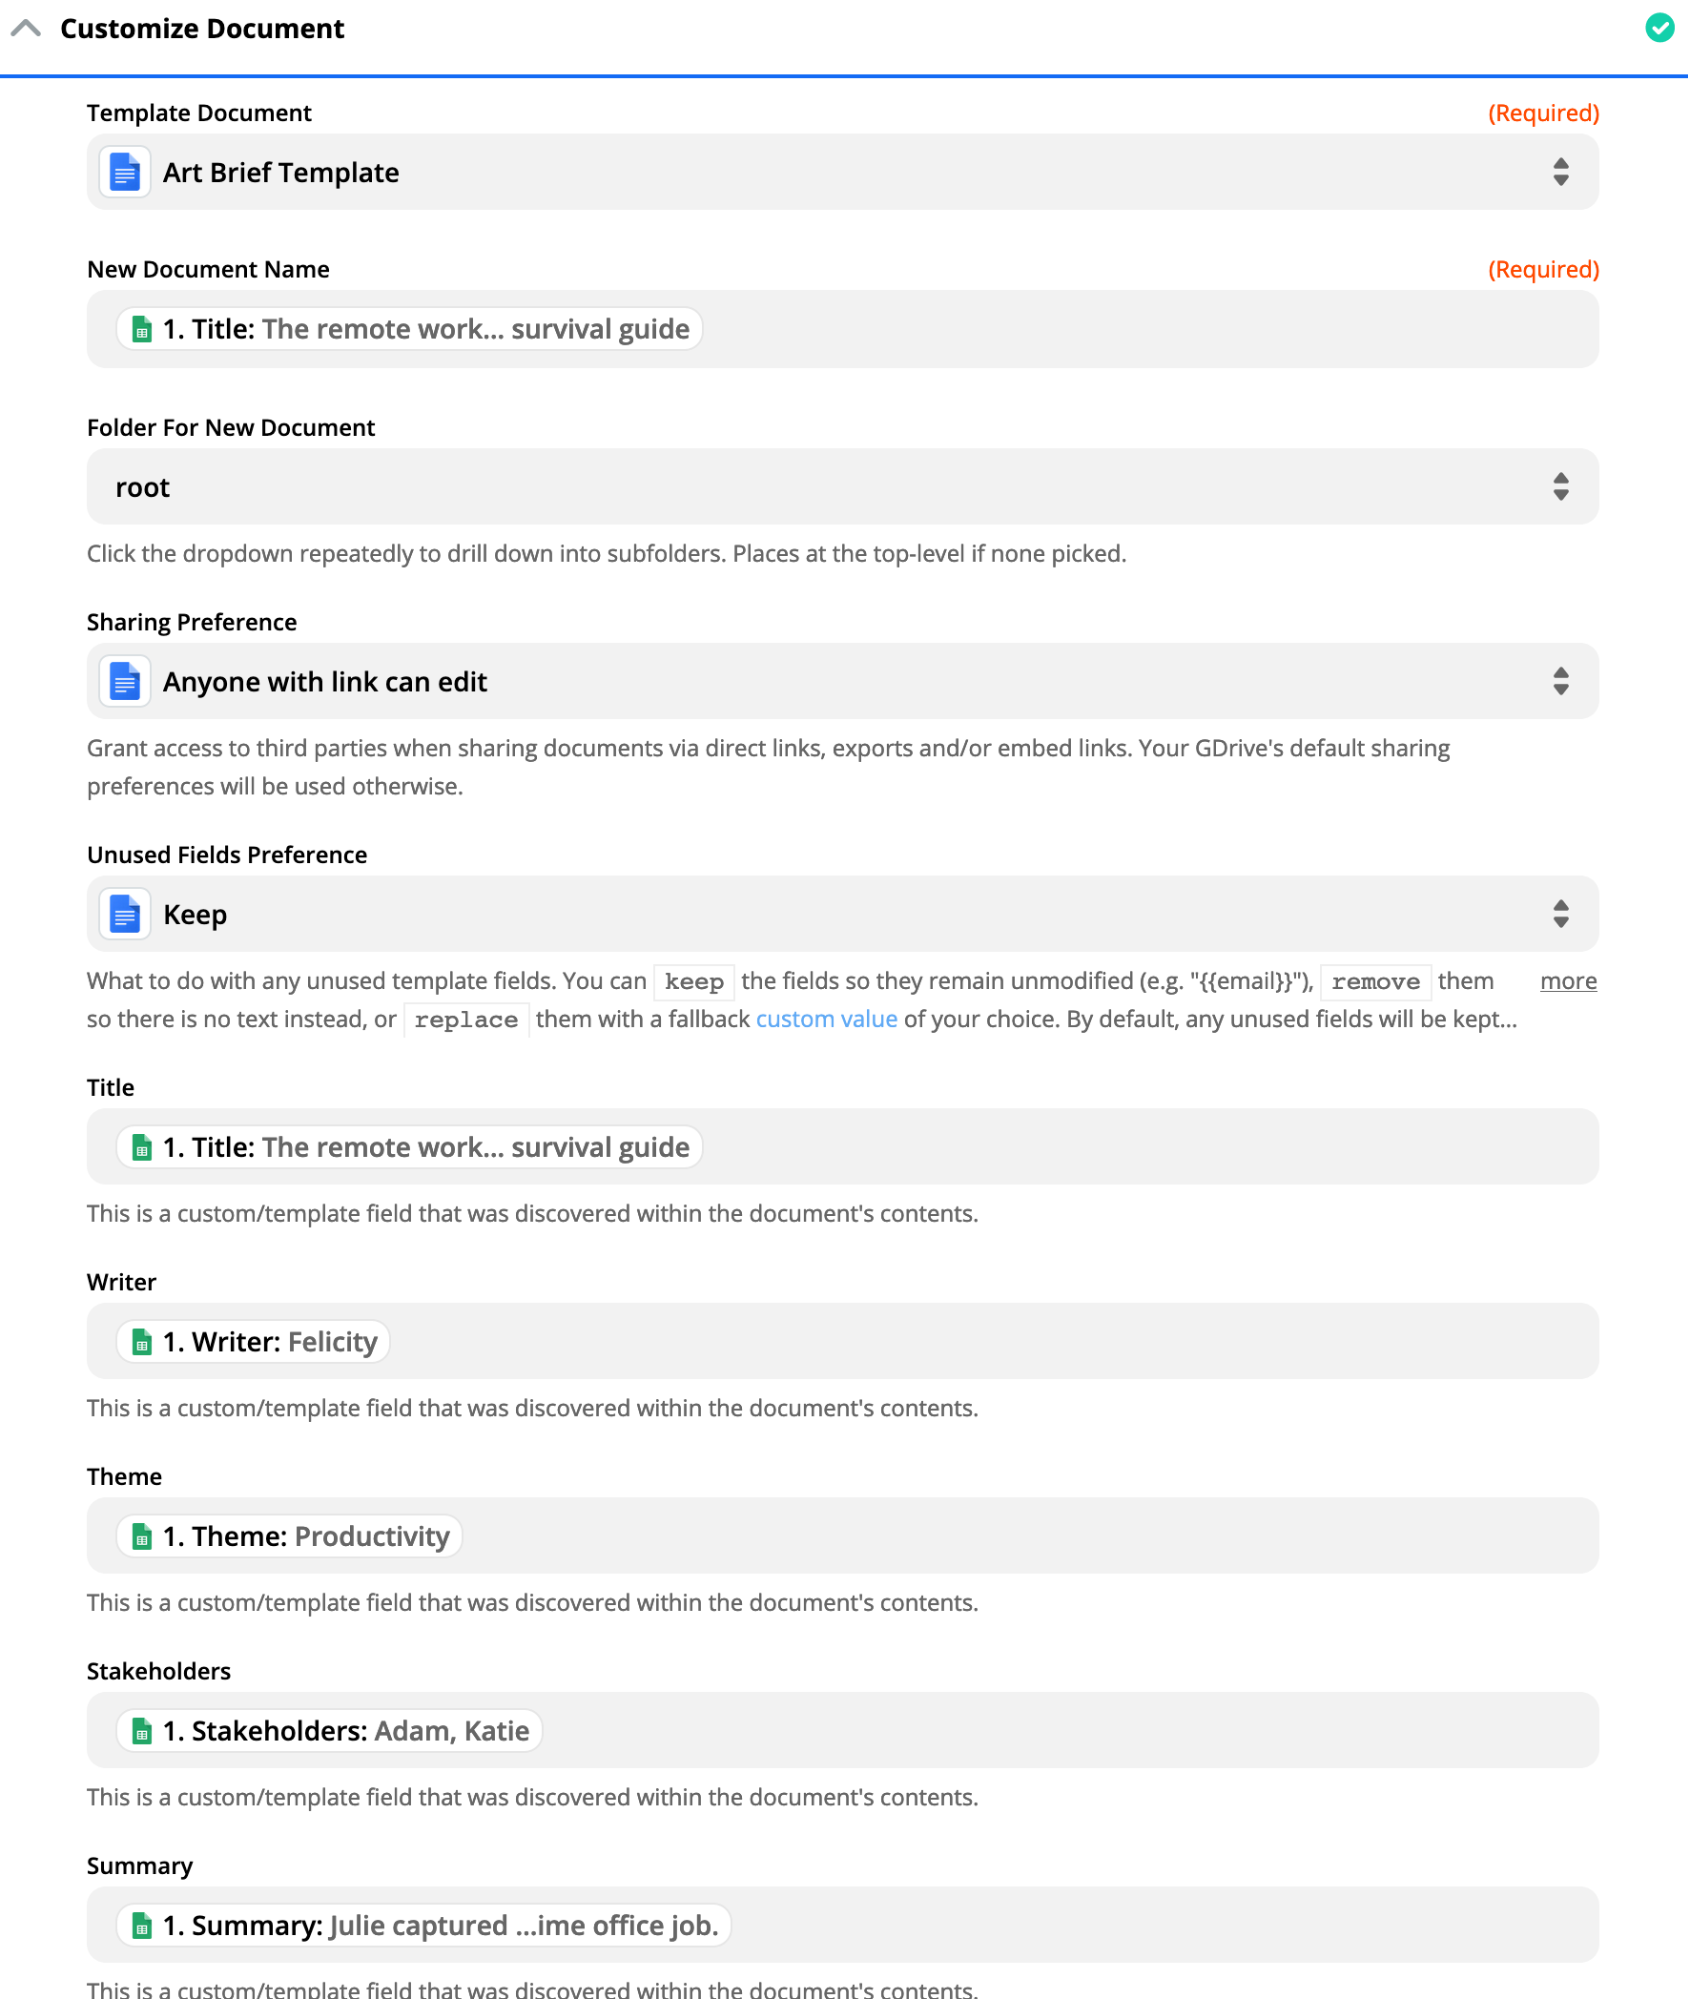
Go to Zapier and add another step to your Zap. Select Create Document from Template in Google Docs.

Then, fill out your Google account details just like the previous section. Choose the template you just built as the Template Document.
Customize your new document by giving it a New Document Name (use the title from your first question in the form), and change your Sharing Preference to something fairly open so others outside your organization don't need to request access to read it. Then you'll need to match every template field found in the doc with a field from your spreadsheet. It's a little tedious if your form had lots of questions, but you only need to do this part once.
Run a test to make sure everything looks good. We're almost done!
The last step is to let someone know whenever they submit your form that their new Google Doc is ready, which you can do in a variety of ways (email, Slack, etc.).
Step 4: Notify the user that submitted the form by DM in Slack
When we generate a new Google Doc from our template, we need to let the person who filled out the form know it's ready, and for that we'll use Slack.
Add another step to your Zap to Find User by Email in Slack. This works if your Google email login matches the email you use in Slack (something a lot of companies automate with Google Apps and Slack SSO).
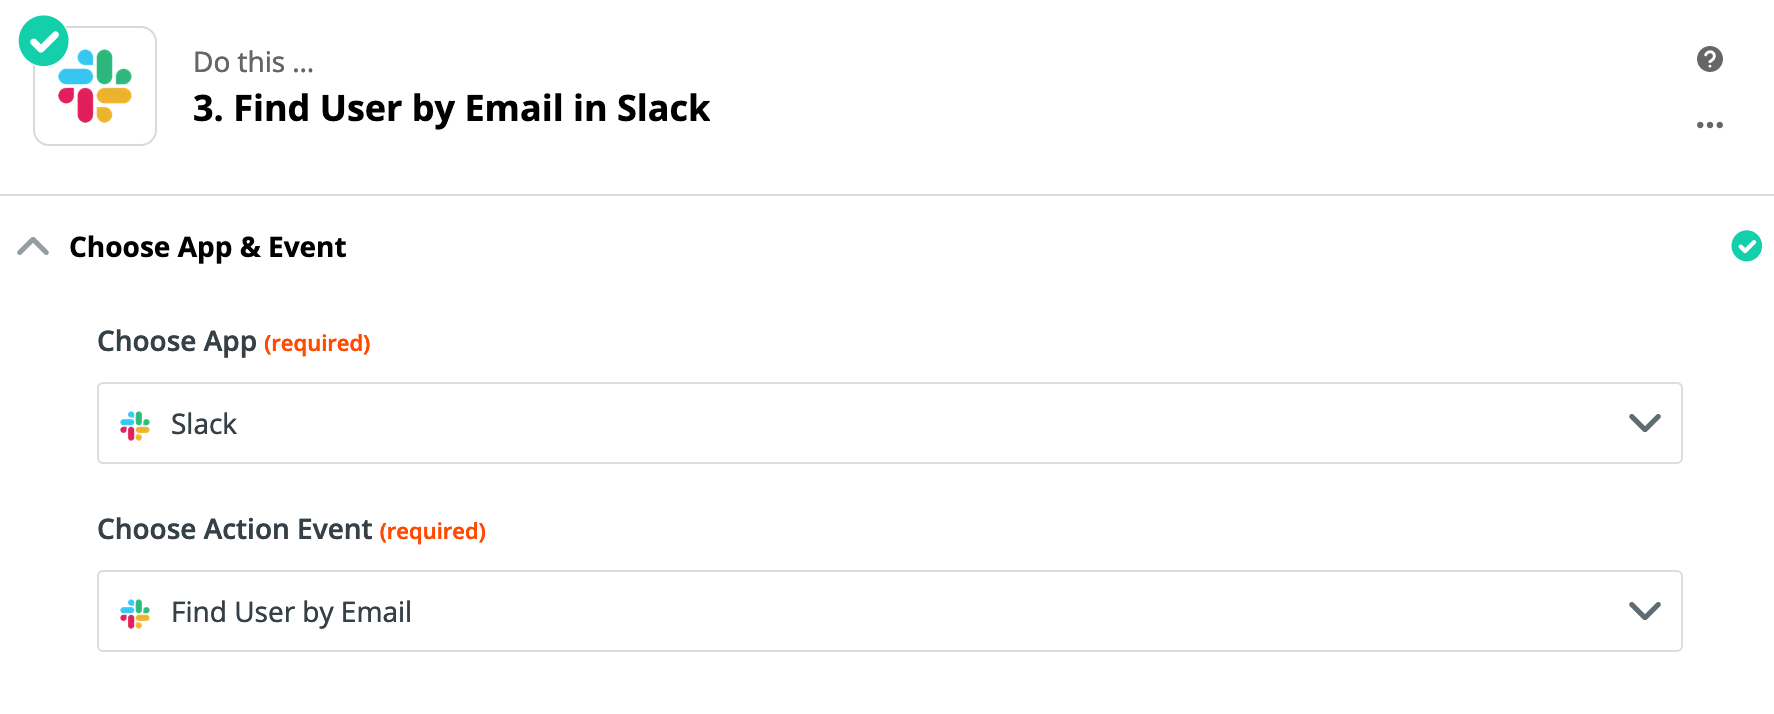
Go through the next step to associate your Slack workspace with your account. Then, in the following step, find the email column in your Google Sheets that was saved automatically upon form submission (using the Collect email addresses option).
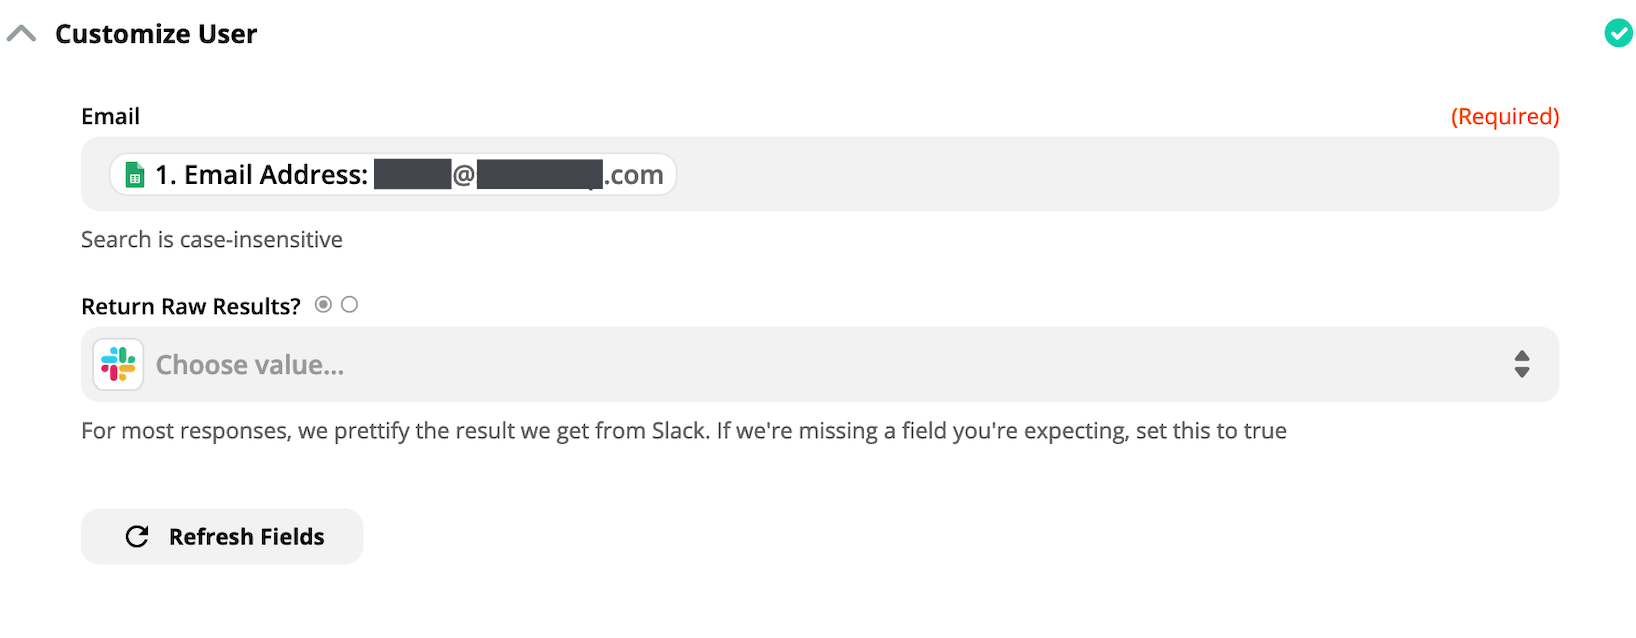
Test it all out and proceed when it's working.
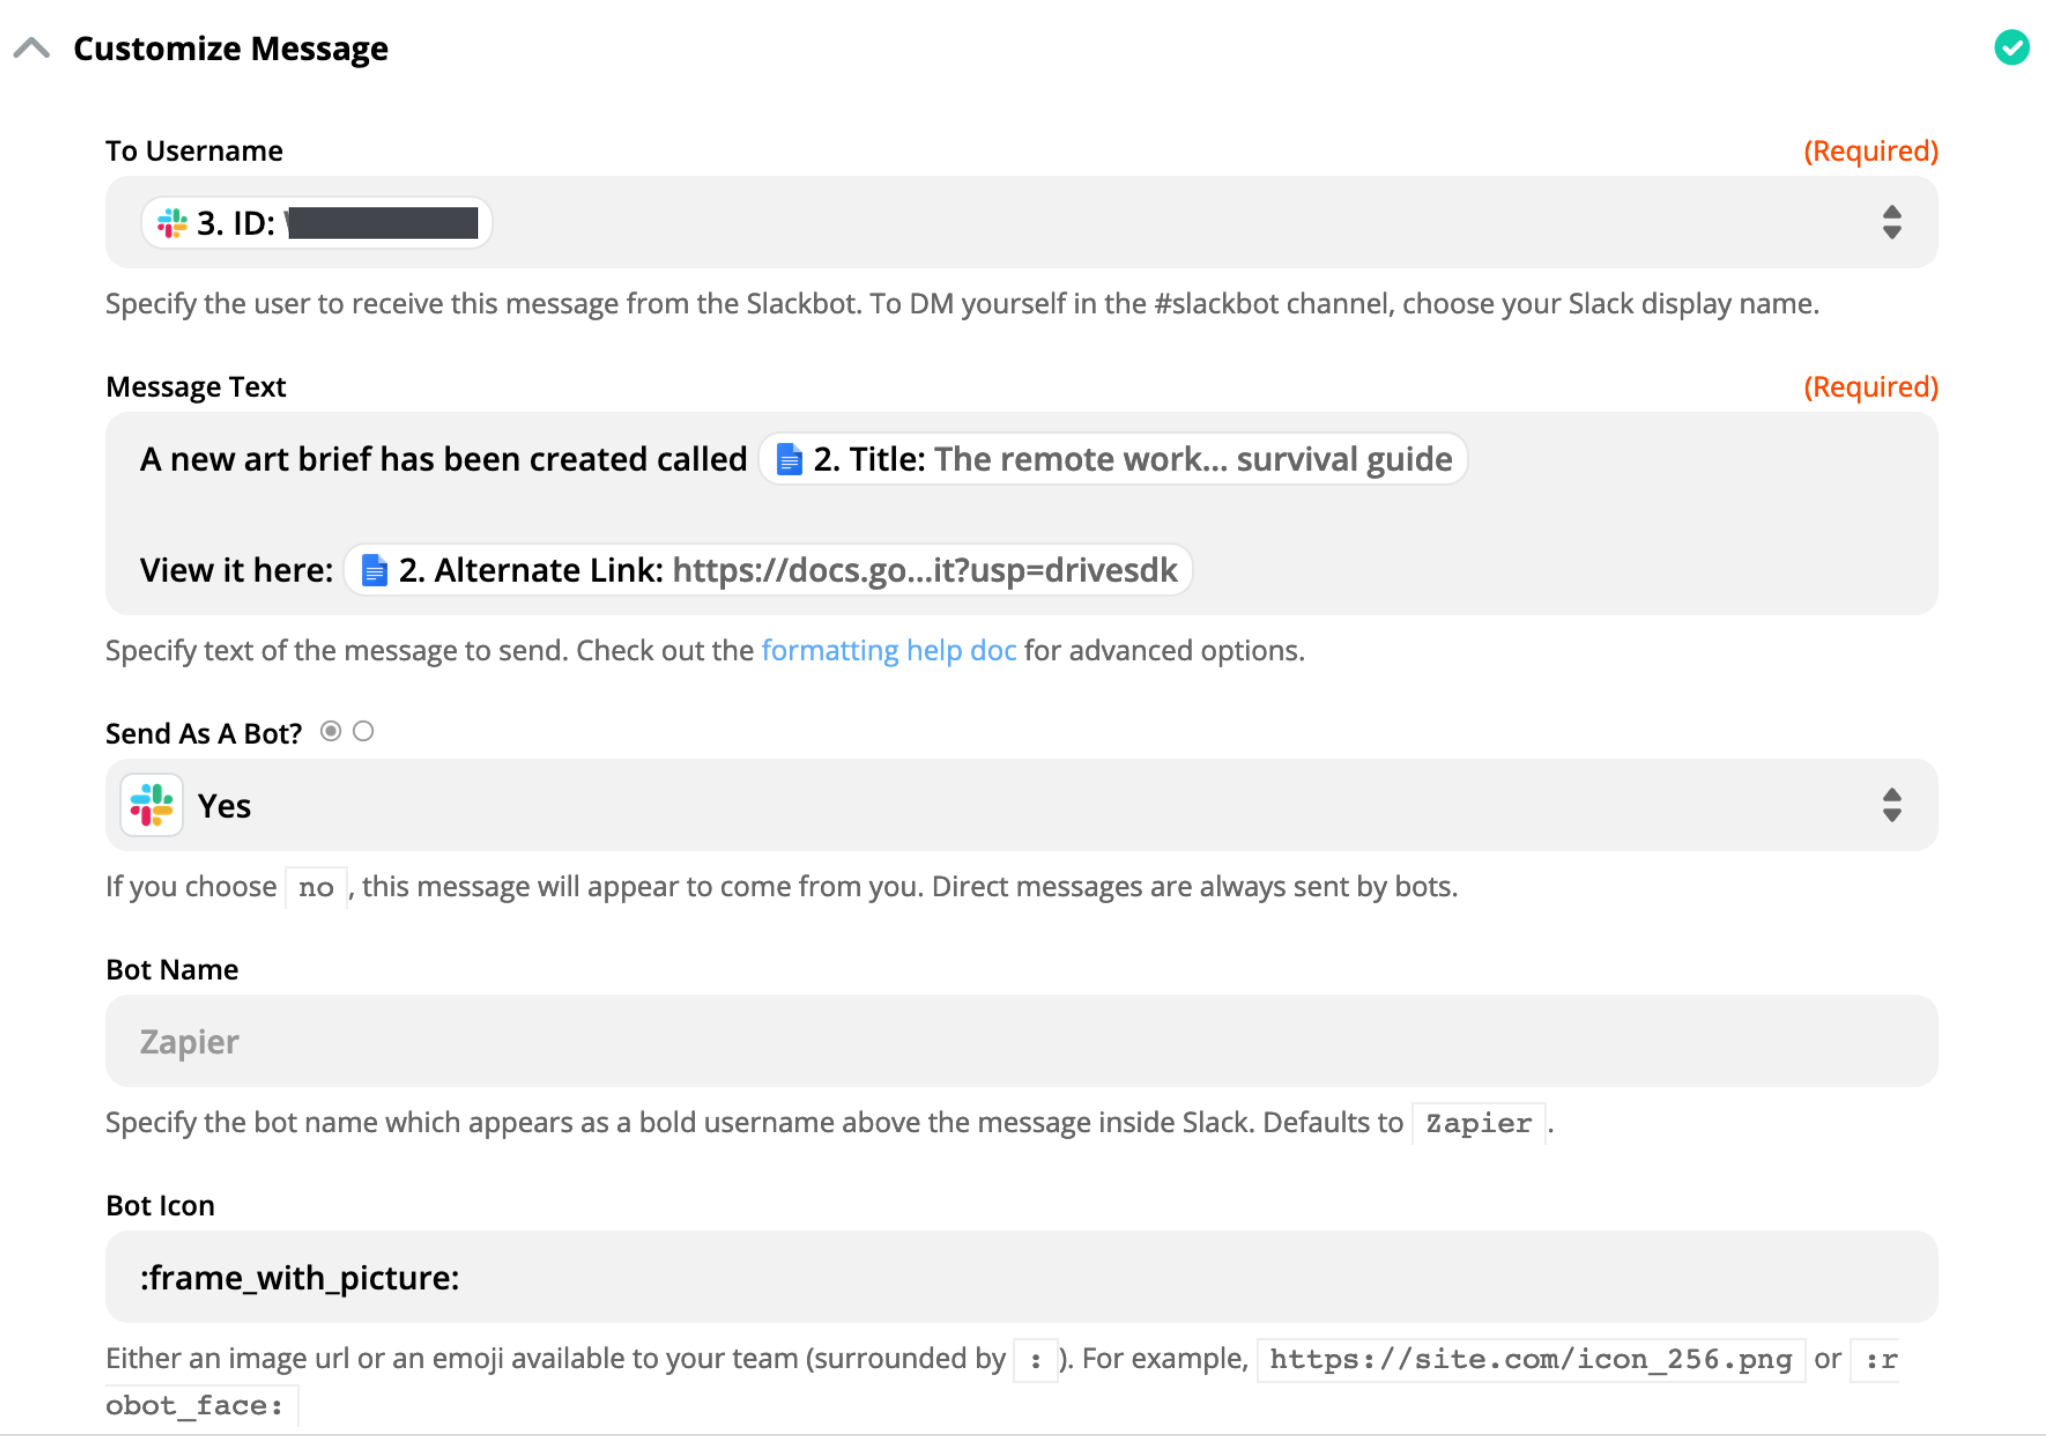
Add a fourth step to your Zap to Send a Direct Message in Slack.

Then associate your account with your Slack workspace much like the previous step. Customize the To Username so it sends the message to the username found in the previous email-lookup step, then add the title from the Google Doc template and a link to view it in the Message Text. Customize any other aspects of the DM, then test it out to make sure it all works.
You're done!
If everything is working, any time someone fills out answers in Google Forms, moments later they'll get a DM in Slack with a link to their document. From there, they can share it out wherever needed.

The doc linked in the DM will contain all the formatting and display settings you used in the template. It will be automatically viewable and readable by anyone with the URL, so it can be passed along to anyone who needs it—in our case, art directors, illustrators, or contract artists.
Customize this Zap for your use case
If you want to use this workflow, click Use this Zap and get started.
It can be easily modified to send the completed template into a Slack channel instead of a DM. Or you could add another step that adds it to a new Asana task or another project management tool as a supporting document for project managers to follow. However you use them, automating templates can help you replace repetitive processes in your company with something faster and easier.
This was a guest post from Matt Haughey, Senior Writer at Slack. Want to see your work on the Zapier blog? Check out our guidelines and get in touch.